ONE Health is a convenient, secure platform for health care providers to access patient records and clinical applications. To use ONE Health, you will need a ONE ID Account.
A ONE ID account (login ID and password) provides individuals involved in delivering health care, as well as health care organizations, with easy and secure access to digital health applications.
To set up a ONE ID account, go to ONE ID Account and begin the process.
How to Sign In with ONE ID
Follow these steps to access the ONE Health Dashboard with your ONE ID credentials:
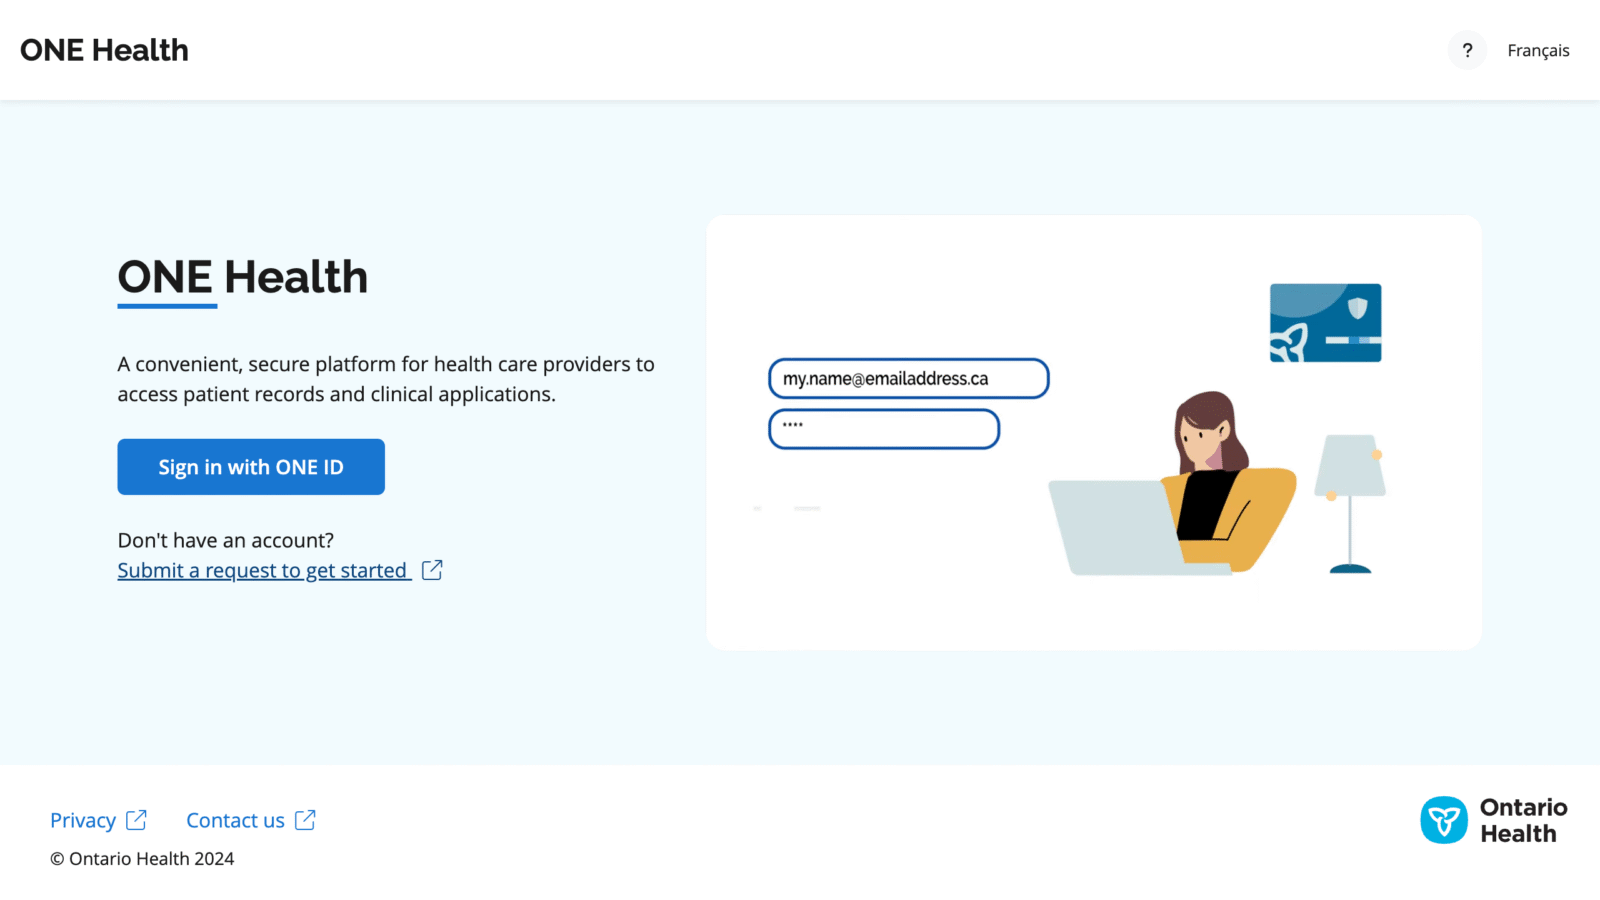
1. Go to the ONE Health Landing Page Navigate to the ONE Health landing page and select Sign in with ONE ID.
2. Enter Your Credentials You will be redirected to the ONE ID Sign In page, where you will need to enter your ONE ID username and password.
3. Verify Your Identity (If Prompted) If required, complete the additional identity verification by answering the provided security questions.
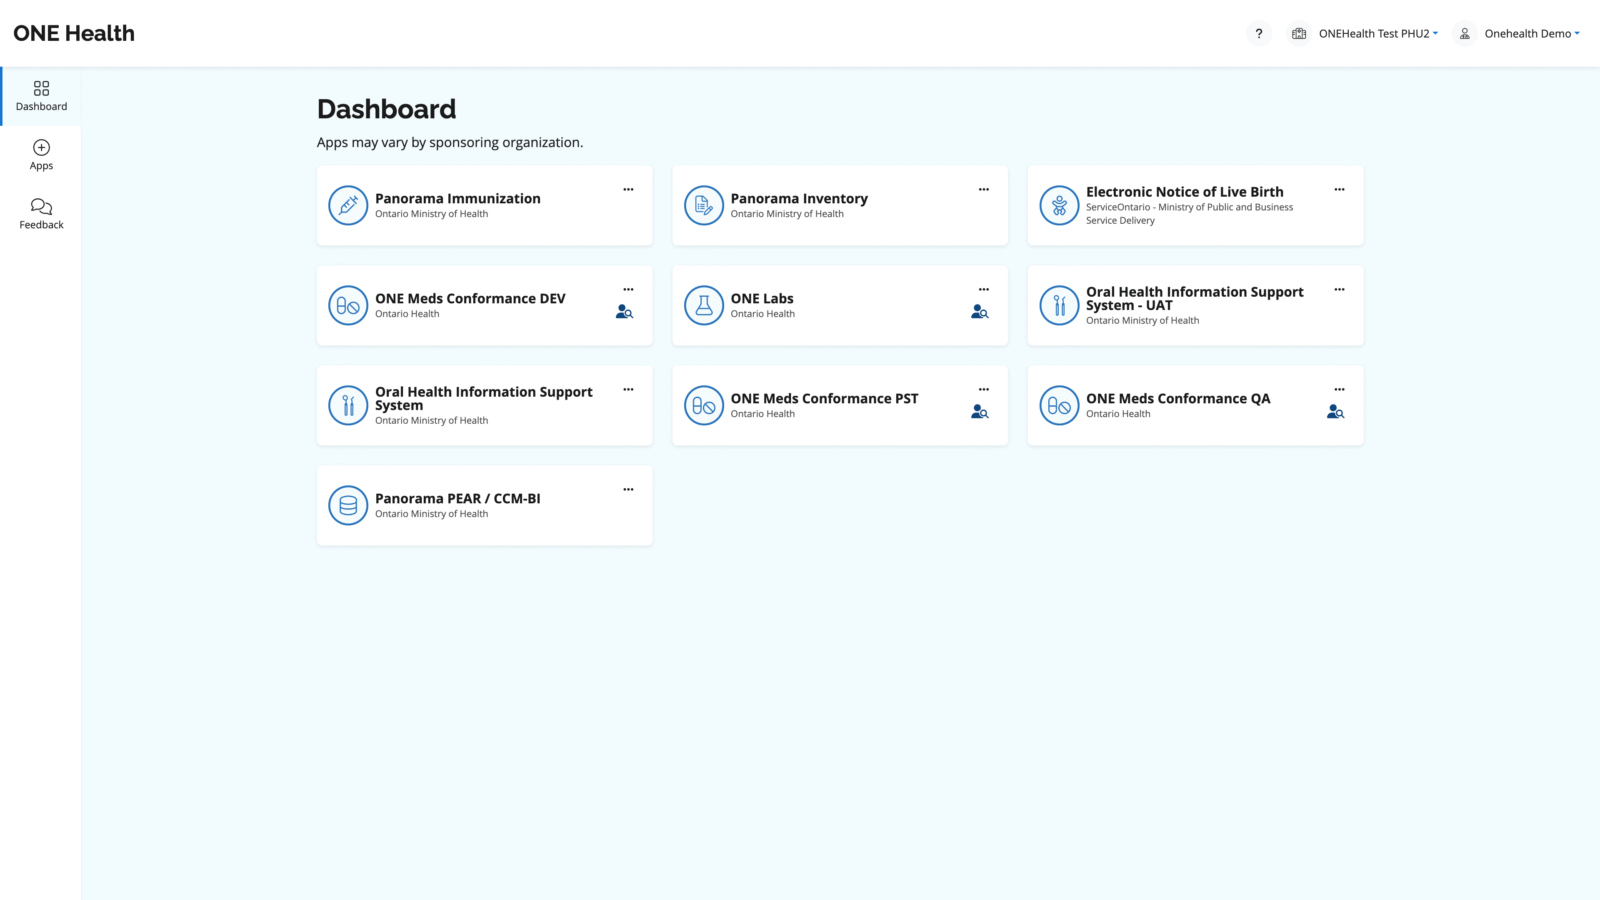
4. Access the ONE Health Dashboard Once successfully authenticated, you will be redirected to the ONE Health Dashboard.
You are now signed in and ready to use the application!
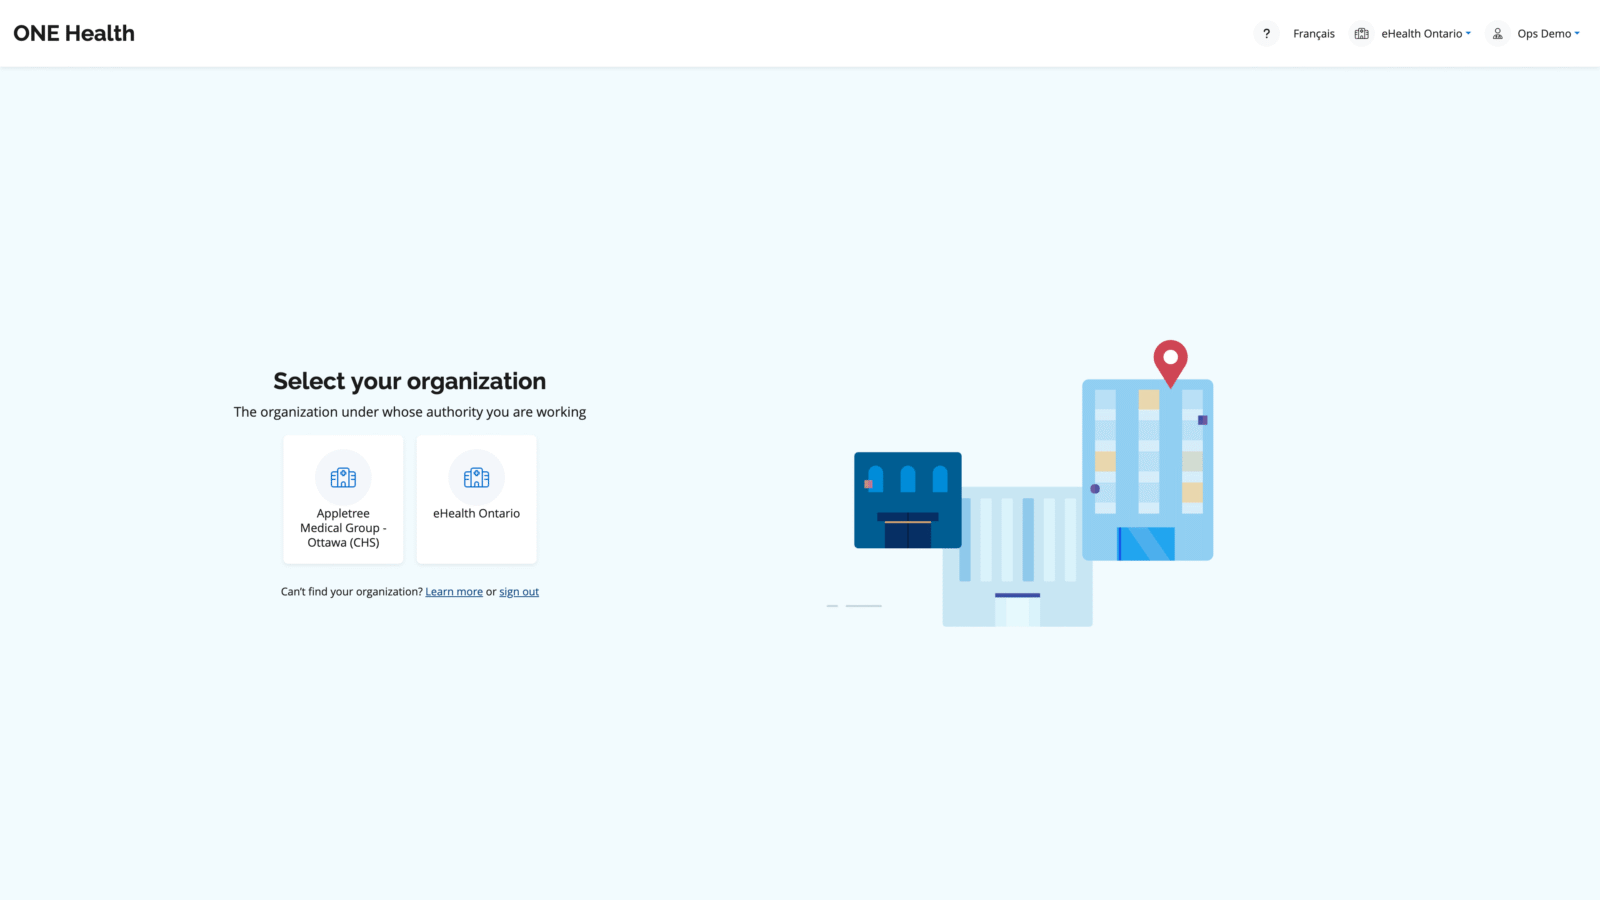
Selecting Your Organization
If you are associated with multiple healthcare organizations, follow these steps to identify the organization for your session:
1. Log In with ONE IDCredentials After successfully signing in with your ONE ID credentials (login ID and password), you will be prompted to select the organization under whose authority (Under Authorization Of) you are working.
2. Choose Your Organization From the list of organizations you are affiliated with, select the one applicable to your session.
Note: For auditing purposes, it is mandatory to record the organization under whose authority you access patient health information.
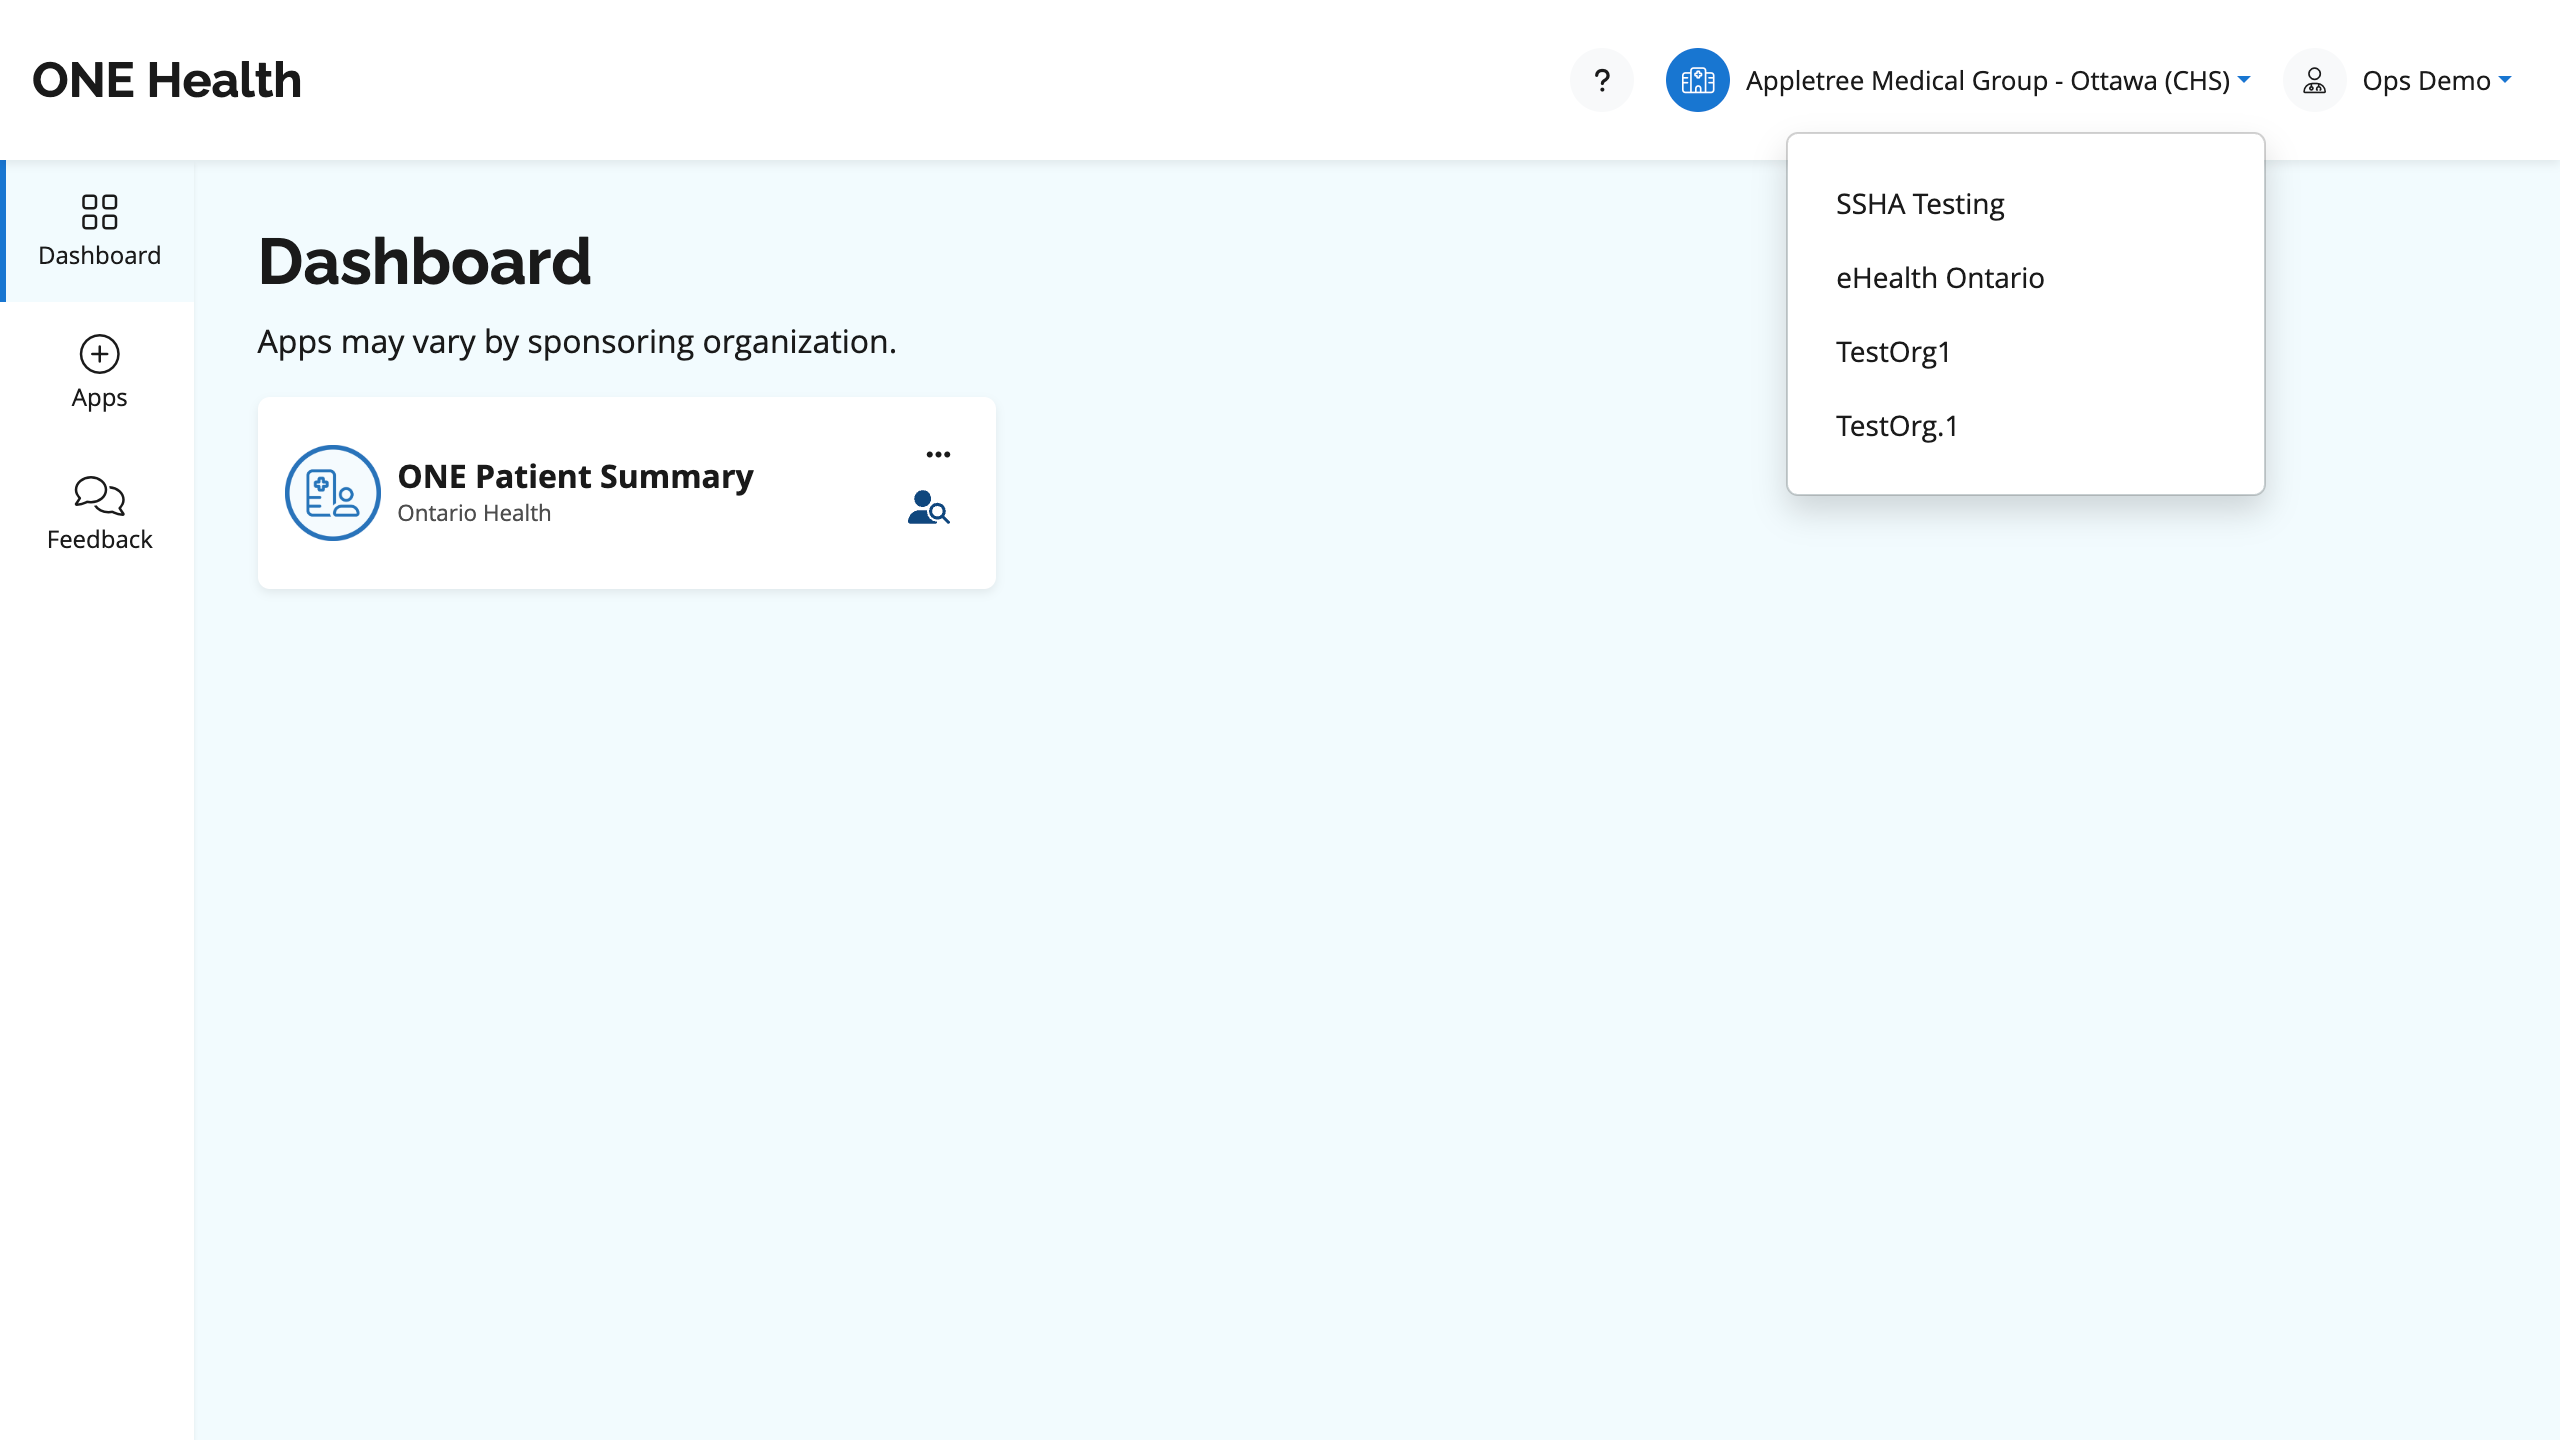
3. Switching Organizations You can switch your organization at any time by selecting another organization from the header.
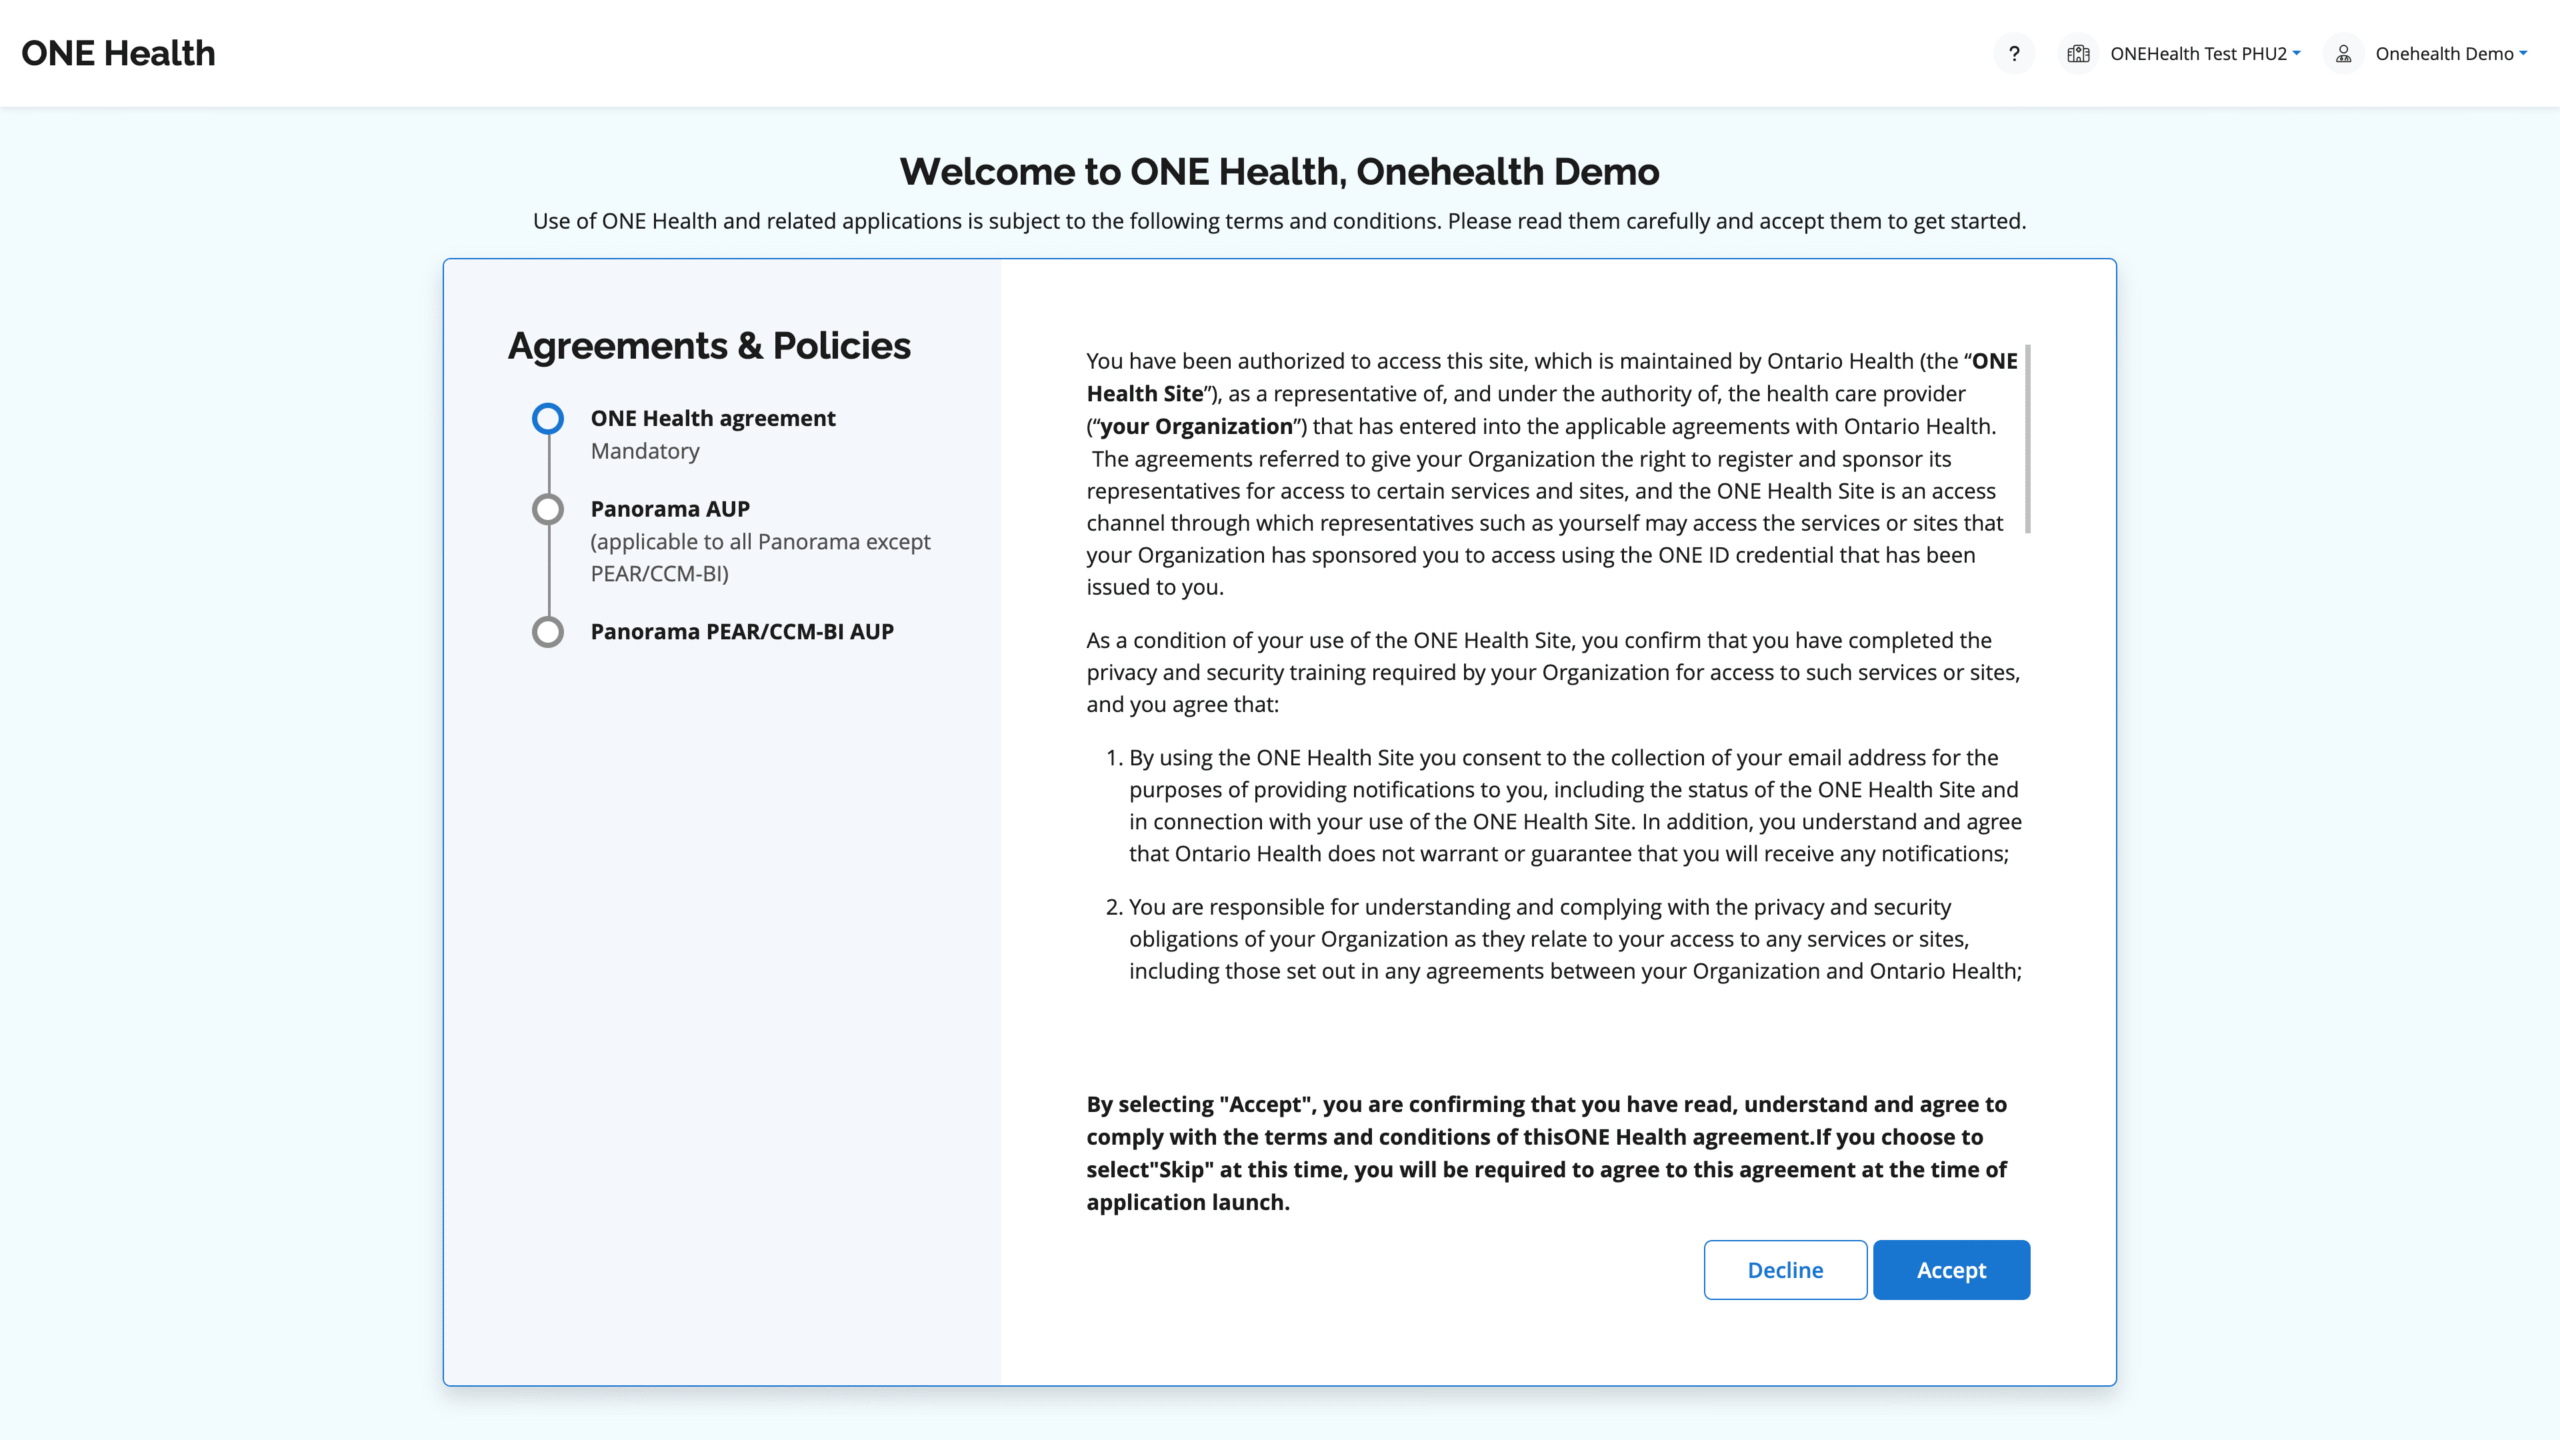
Accepting the End User Agreements
To access ONE Health, you must review and accept the applicable User Agreements as part of your obligations of use:
ONE Health User Agreement The ONE Health User Agreement outlines your obligations when using the platform.
You must accept this agreement the first time you access ONE Health.
Acceptance of the agreement must be renewed:
Annually: 365 days after your initial acceptance.
Upon update: Whenever a new version of the User Agreement is published.
Panorama and Panorama PEAR User Agreements If you are authorized to access Panorama or Panorama PEAR/CCM-BI, you must accept the relevant agreement(s):
Every 28 days from the last acceptance.
Whenever a new version of the agreement is published.
Accepting the Agreement To accept the agreement, select “Accept” on the agreement page.
If you want to skip the Panorama and Panorama PEAR/CCM-BI User Agreements the first time you access ONE Health, select “Skip“. You will be required to read and accept the Panorama and Panorama PEAR/CCM-BI User Agreements before accessing it from your ONE Health Dashboard.
Failure to accept the required agreements will restrict your access to ONE Health.
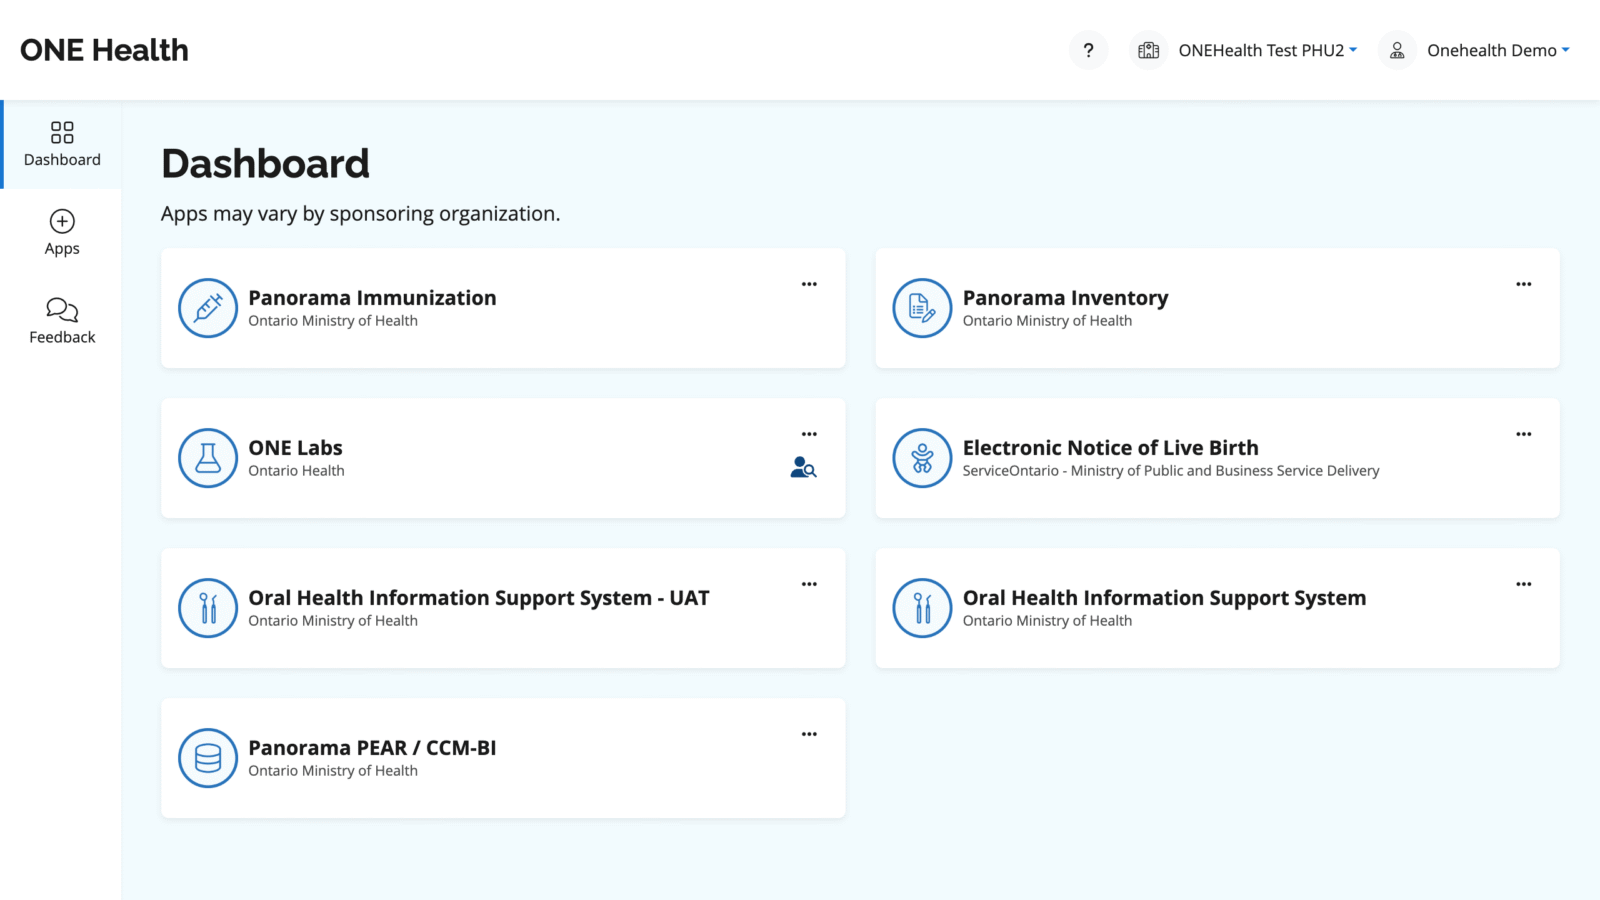
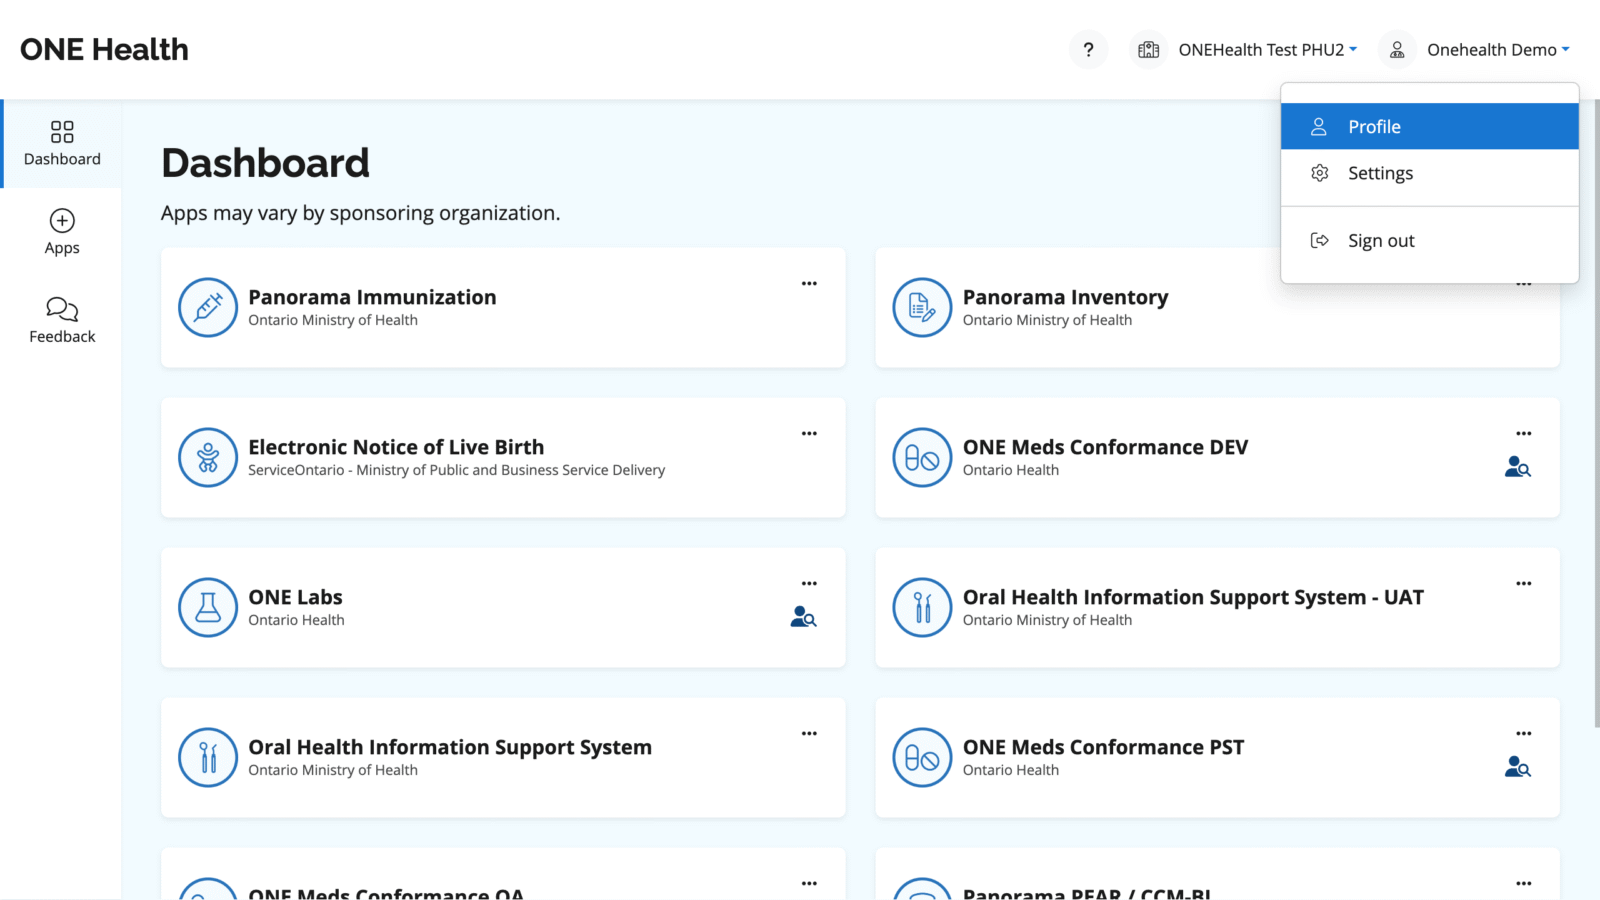
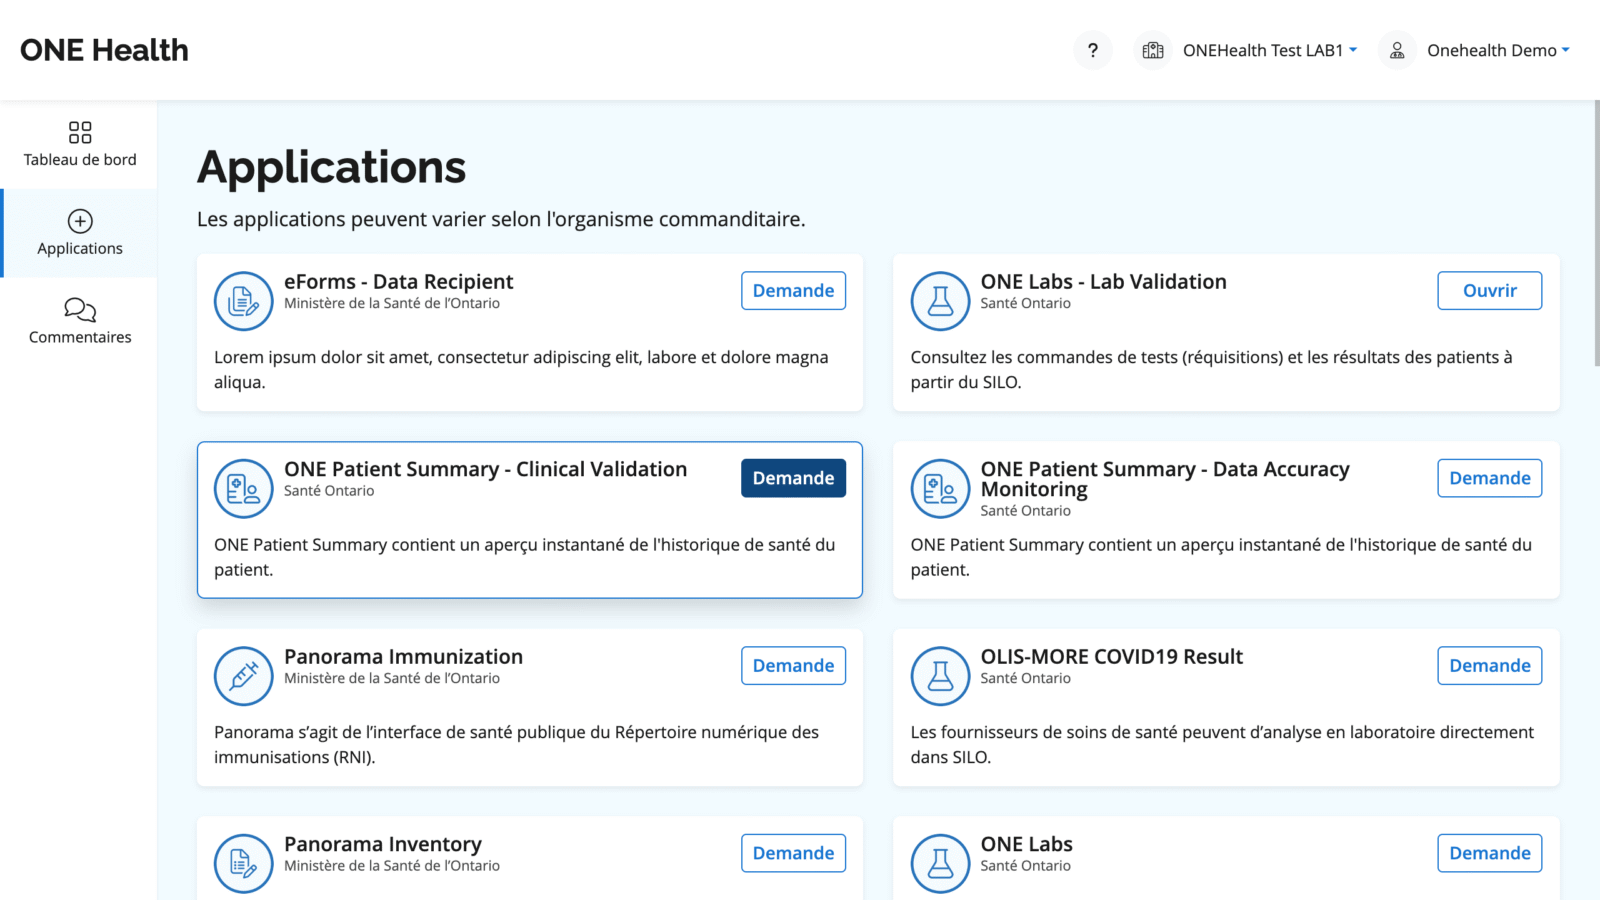
Launching Applications from the Dashboard
Once you have logged into ONE Health and selected your organization, all the applications you are enrolled in will appear on your dashboard.
How to Launch an Application
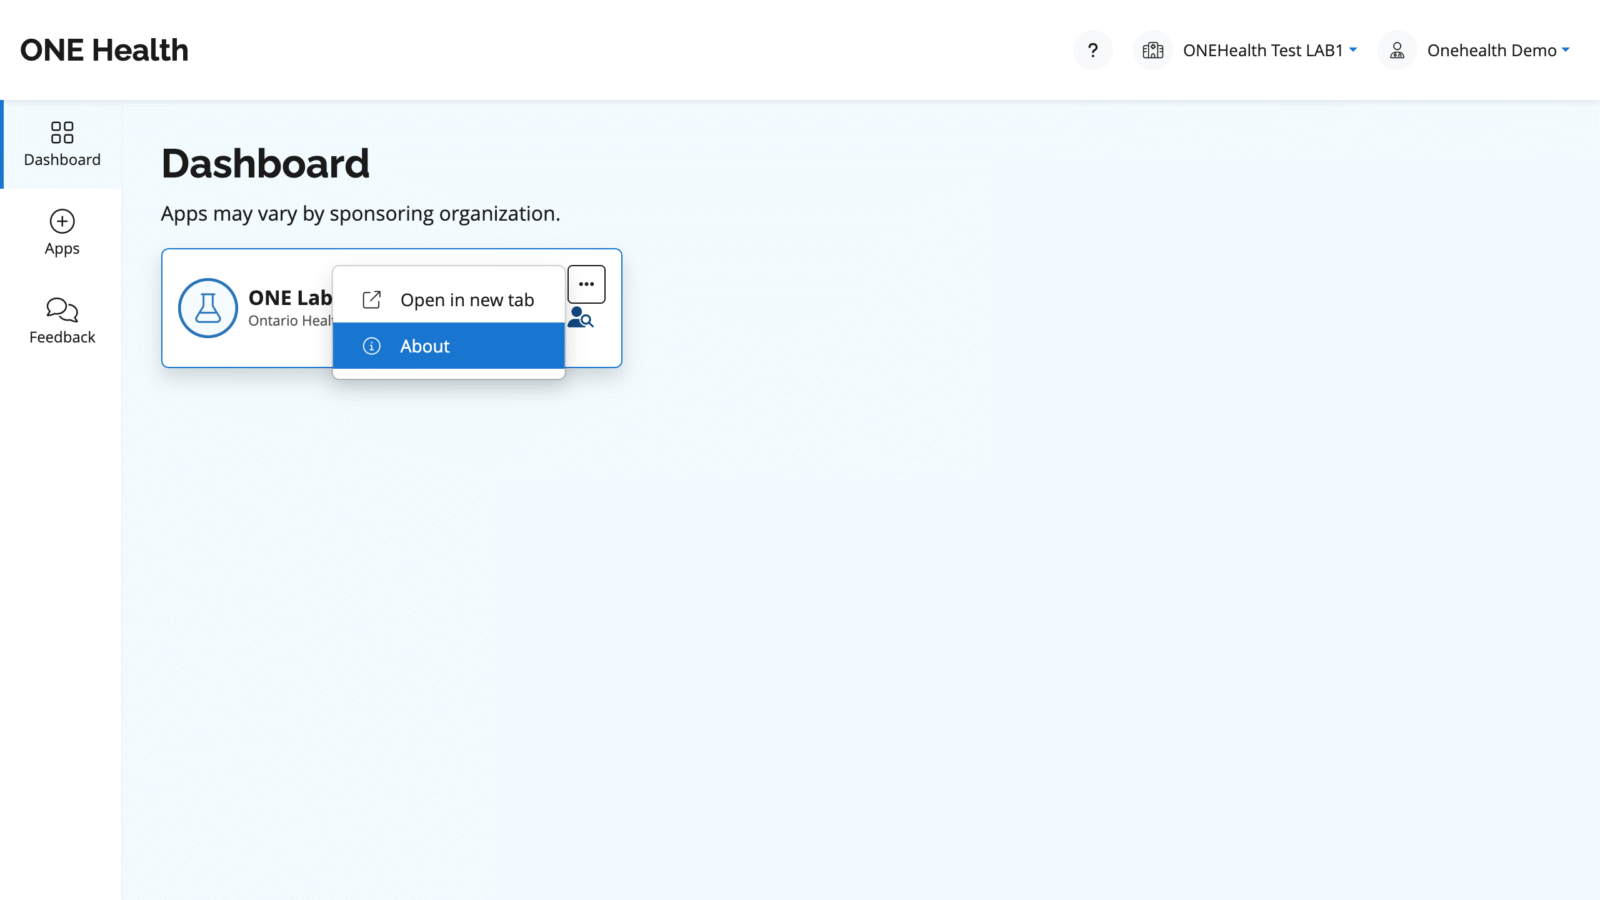
Select the application card displayed on your dashboard.
The application will open in a new tab.
Alternatively, you can also select the Menu icon (ellipsis) and select ‘Open in new tab’ to launch the application.
Applications Requiring Patient Selection If the application requires a patient search prior to launch, you will be prompted to select a patient before proceeding. These applications are identified by an icon featuring a magnifying glass.
Applications Requiring Additional Authentication Some third-party applications require additional authentication steps to launch:
OHISS: VPN authentication is required.
eNLB: MPN authentication is required.
By completing these steps, you can seamlessly access and use the applications through ONE Health.
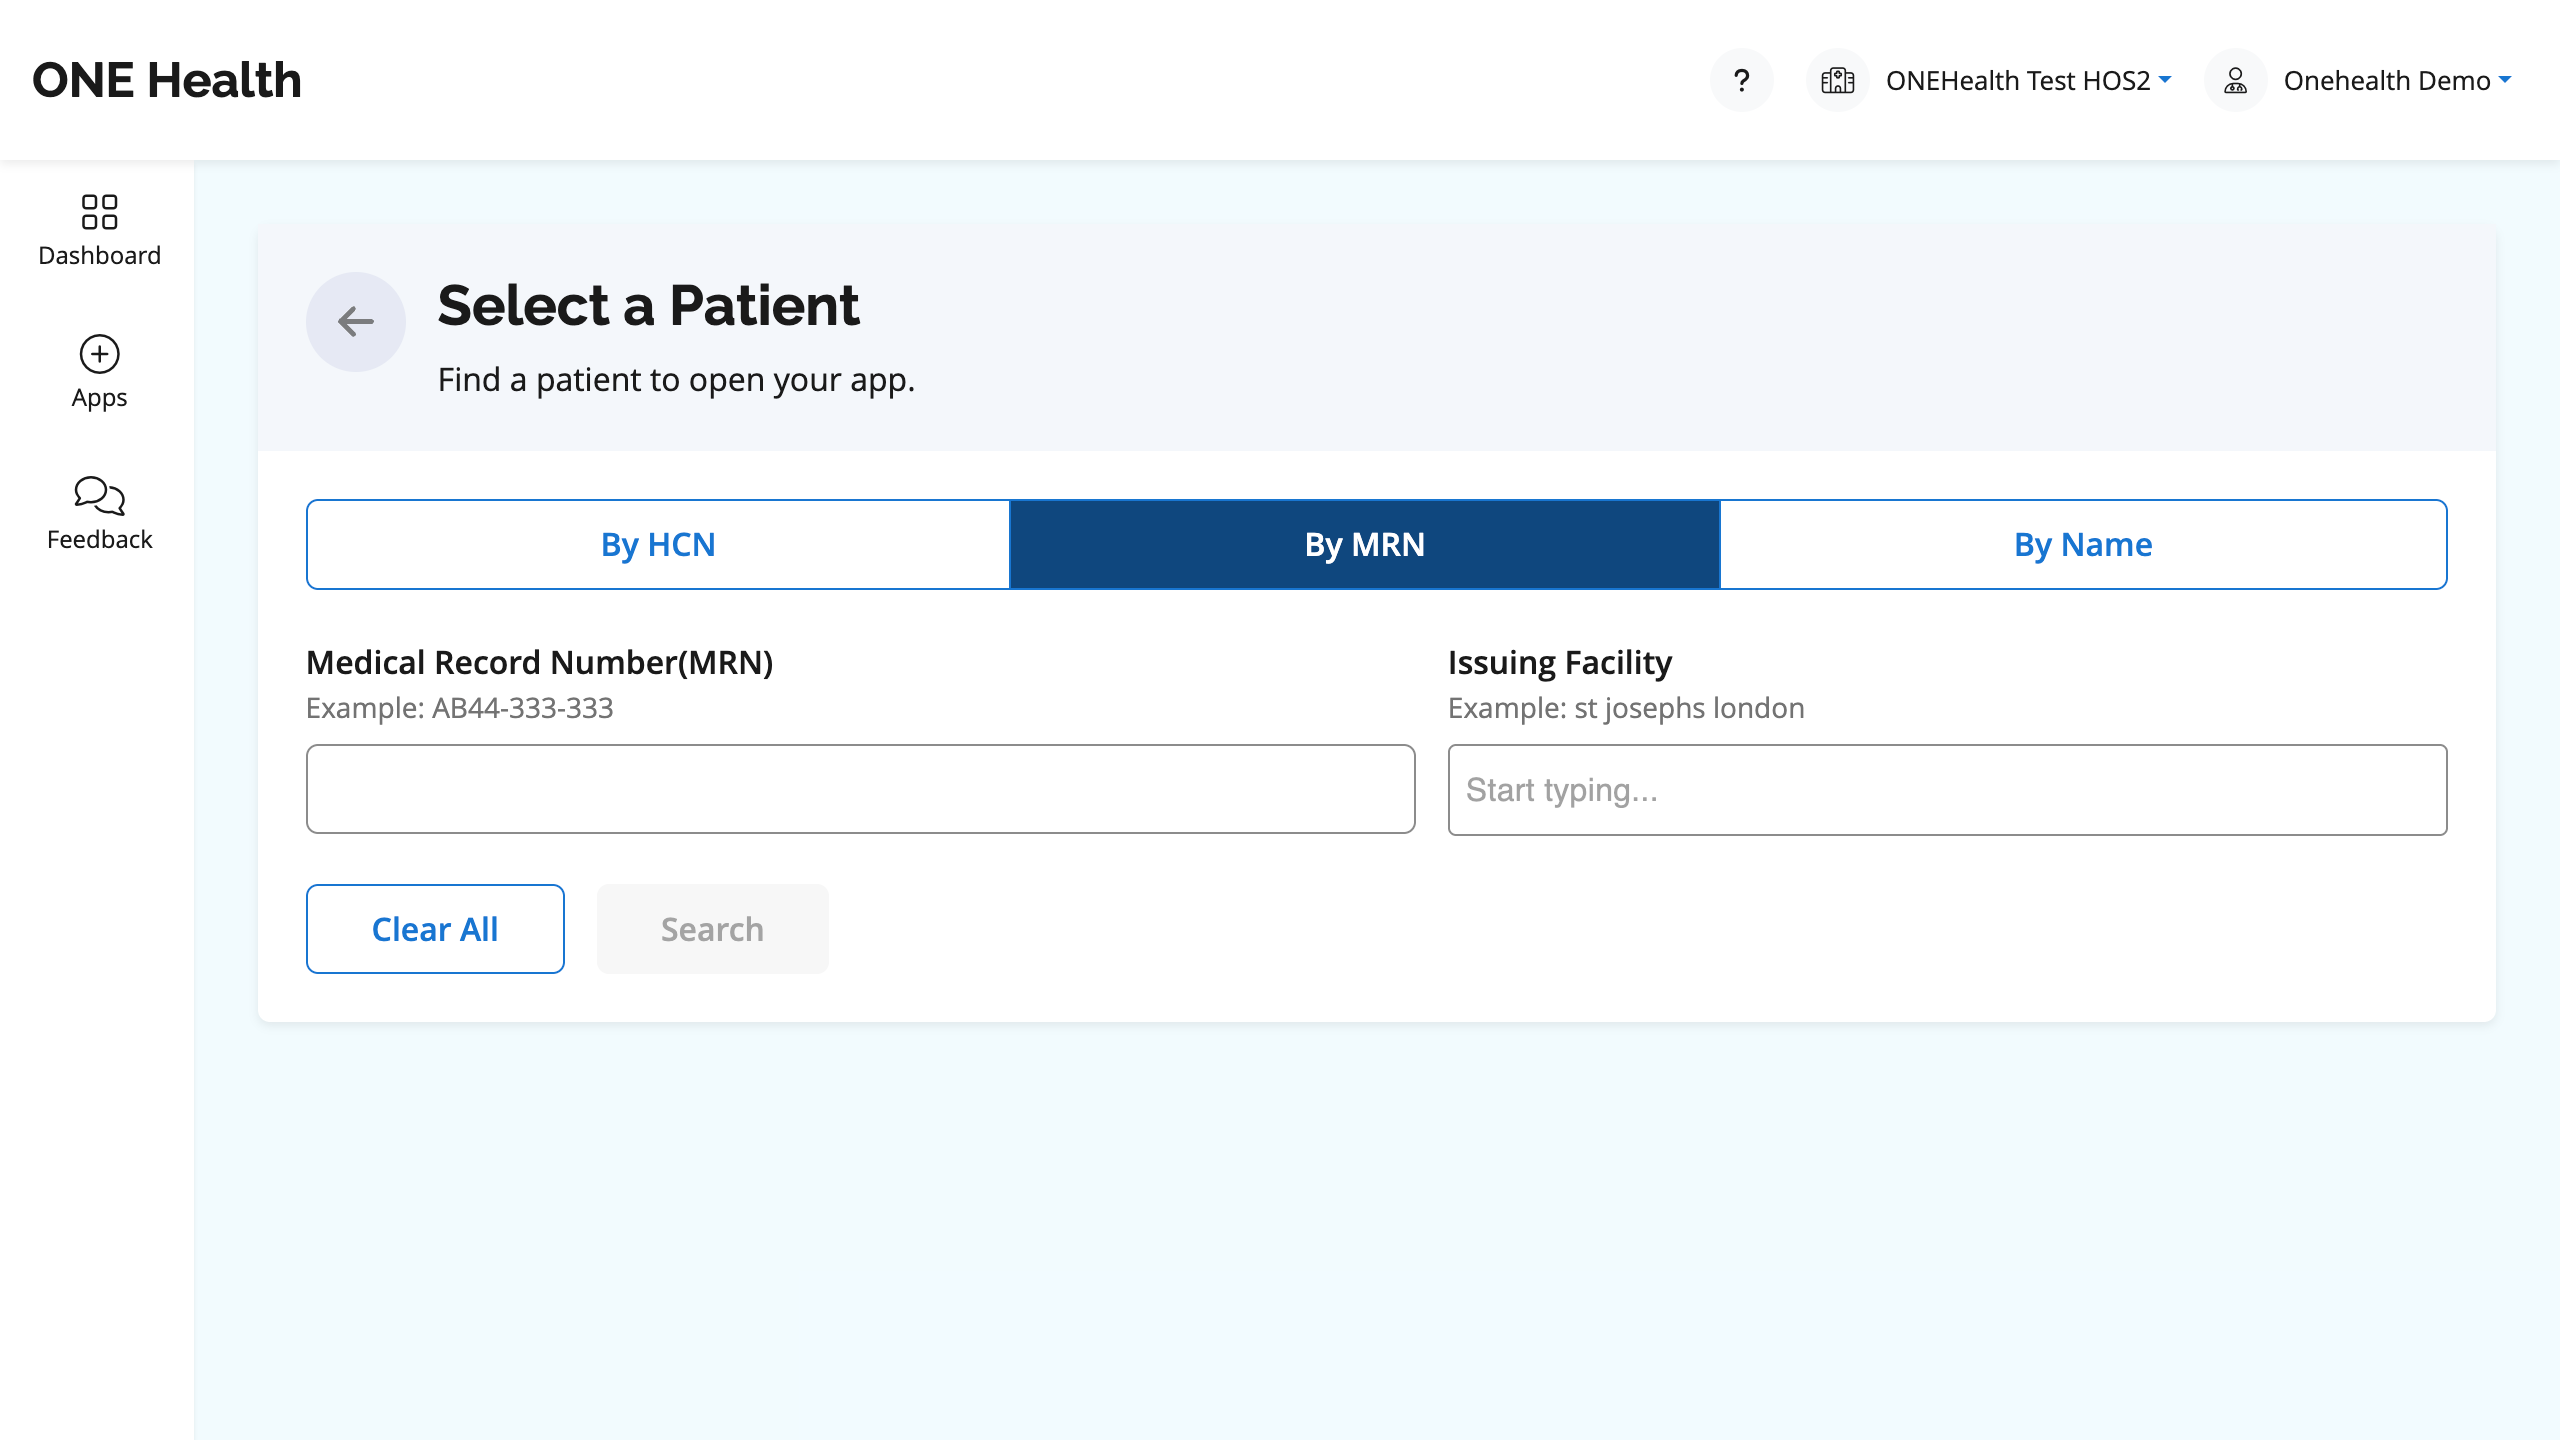
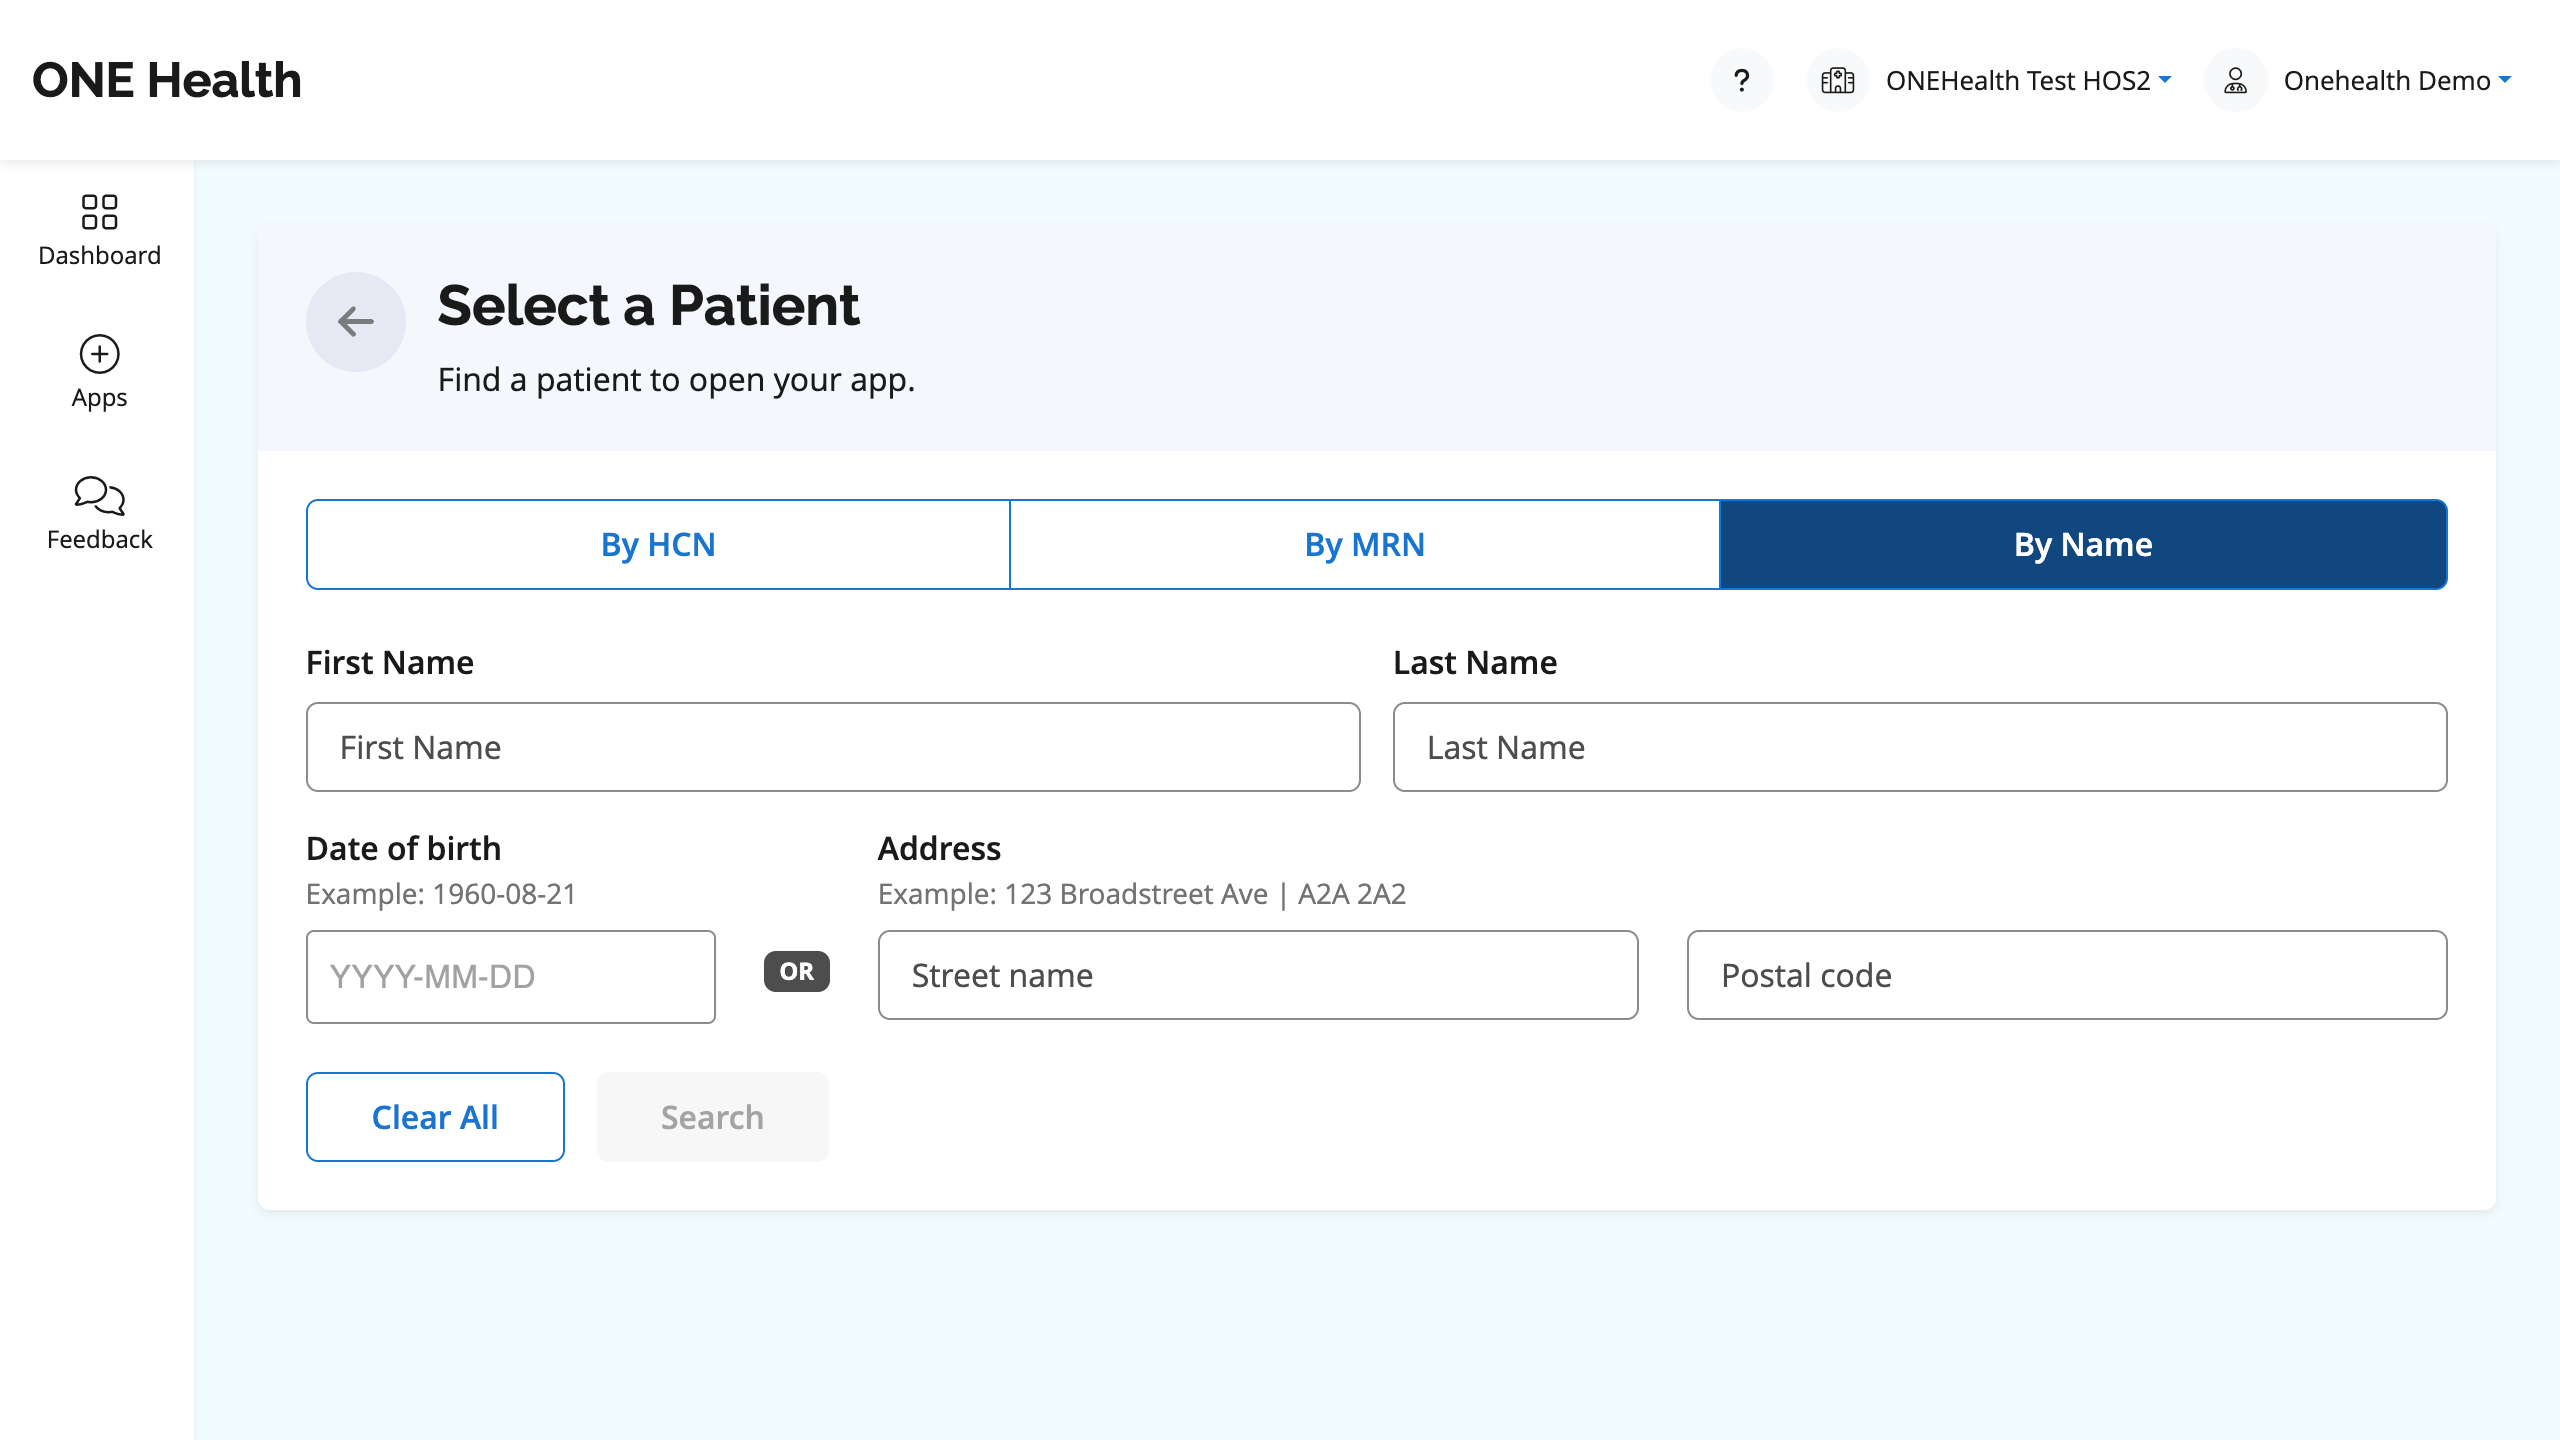
How to Search for a Patient
For clinical users
Clinical users can search for patients in the Provincial Client Registry (PCR), in one of three ways.
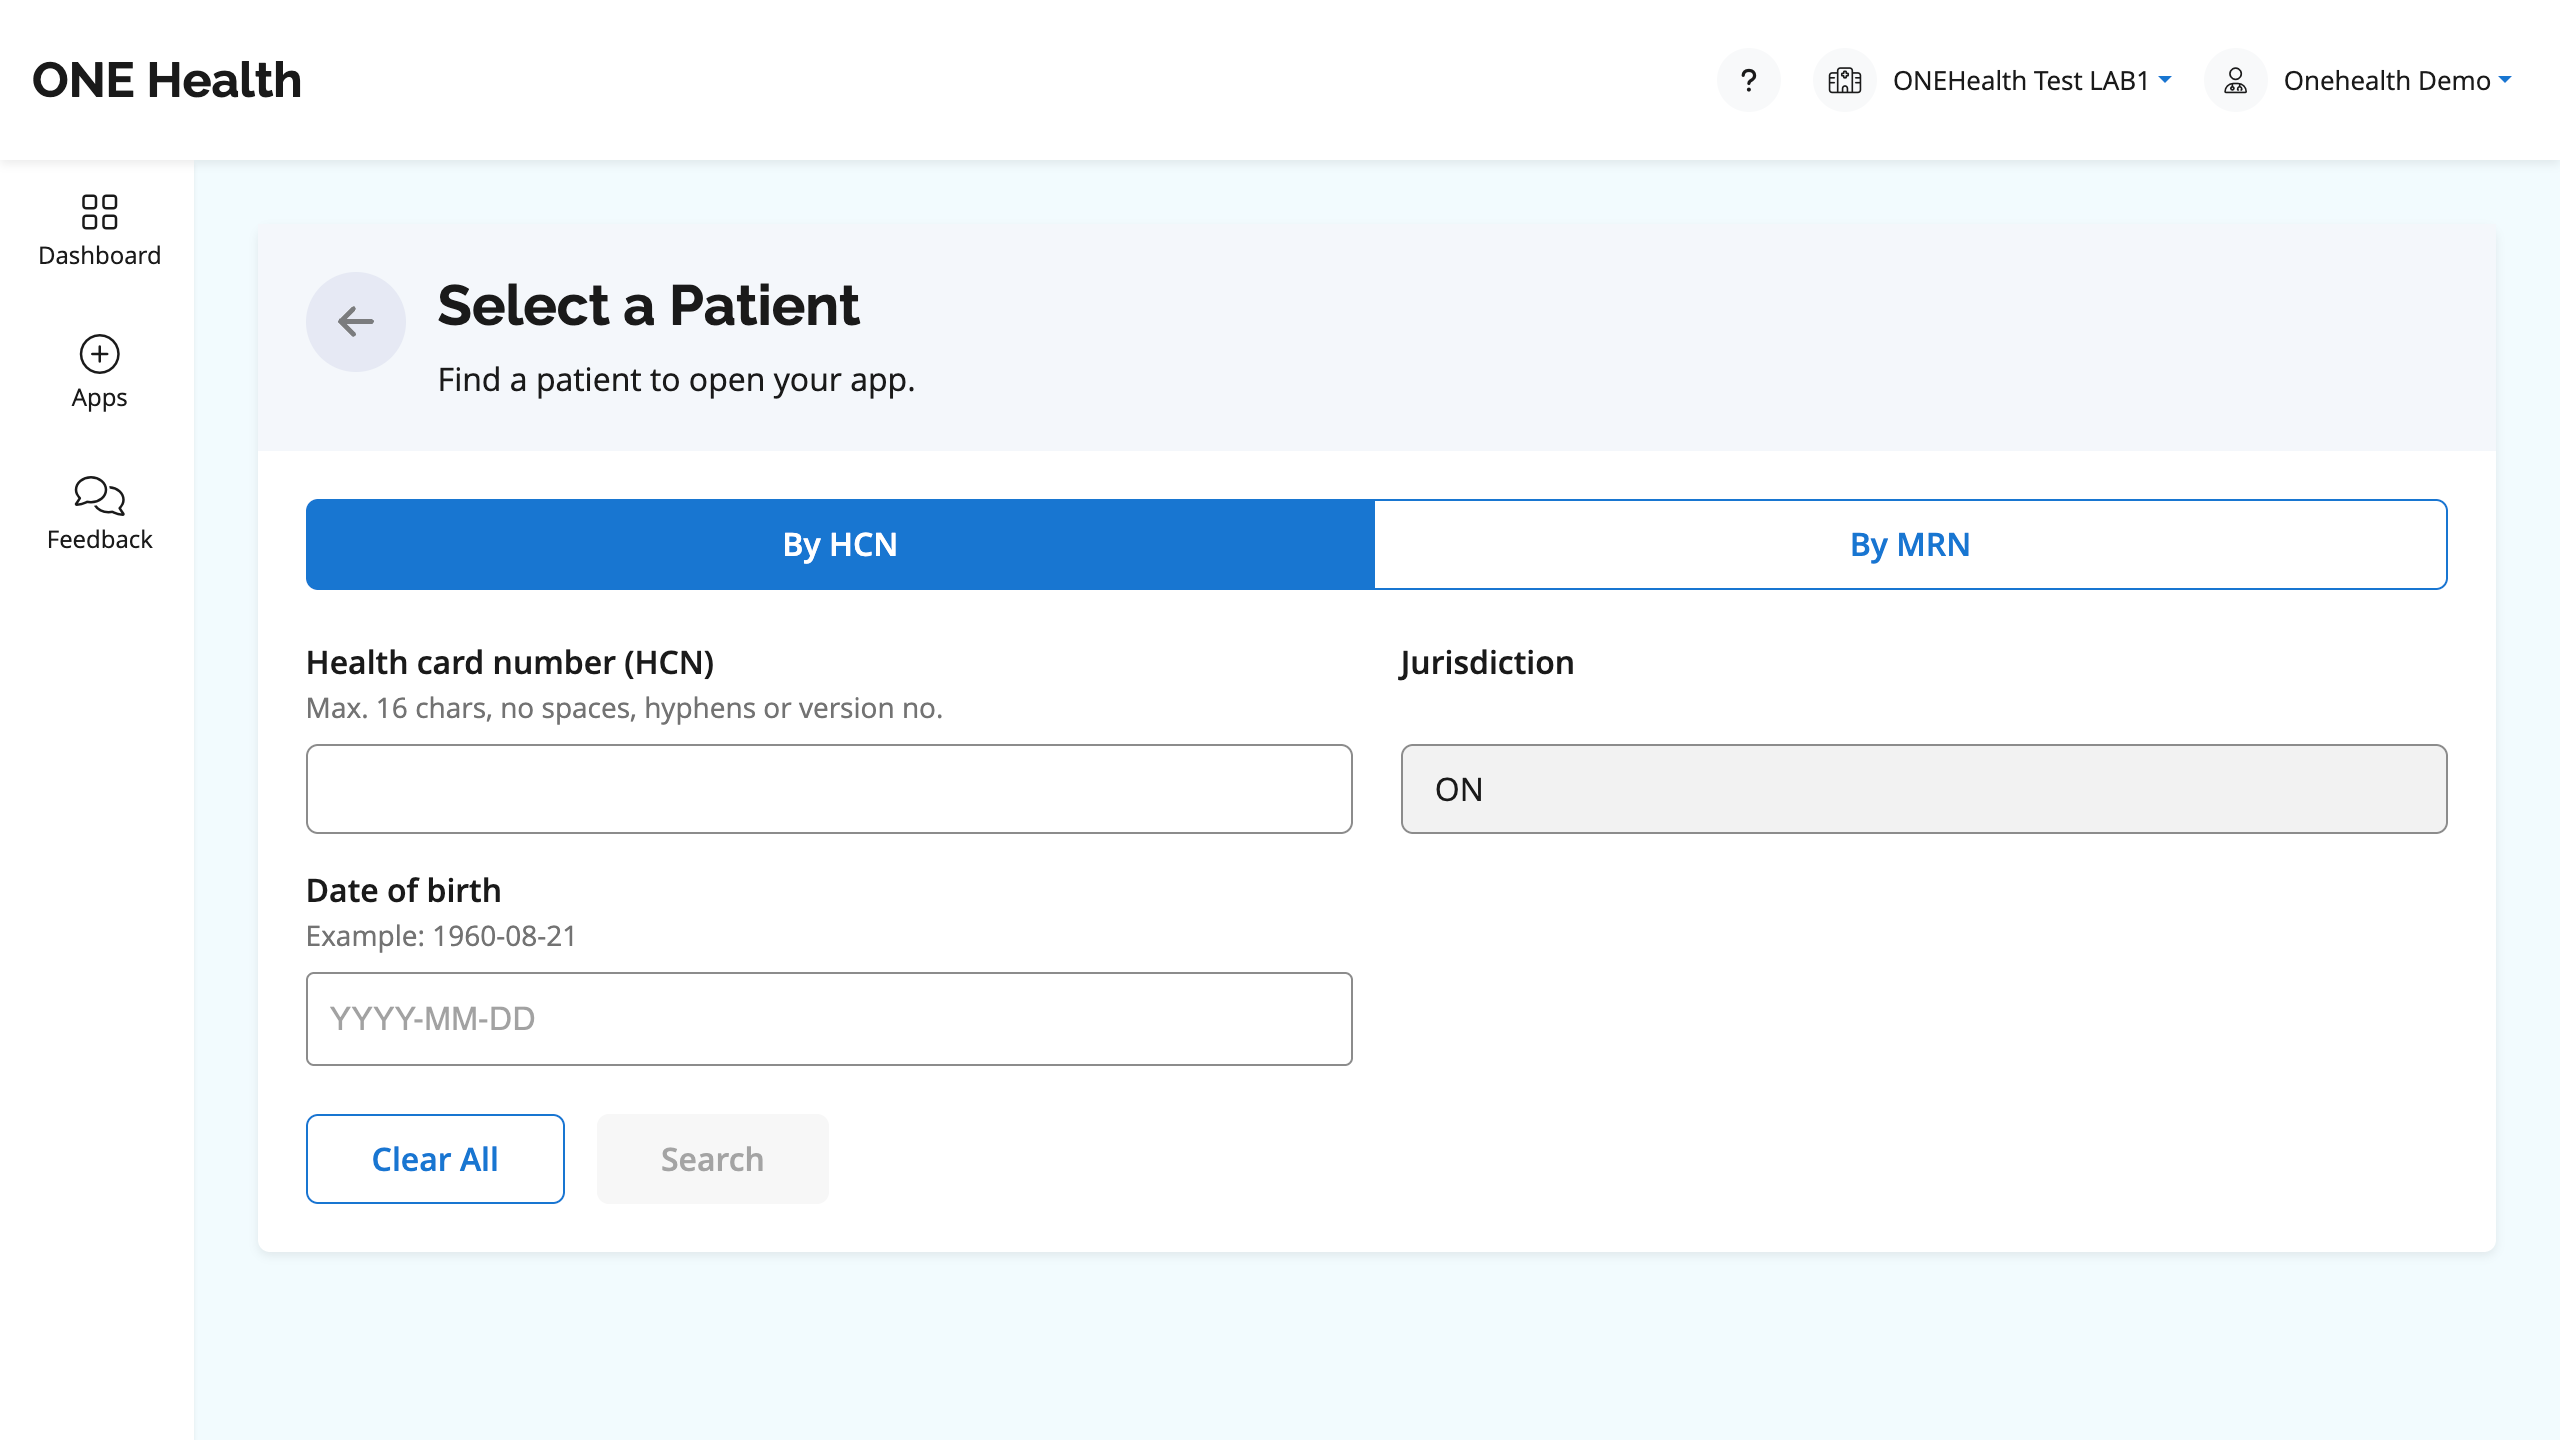
To search by Ontario Health Card Number (HCN),select By HCN, enter the patient’s health card number and select Search.
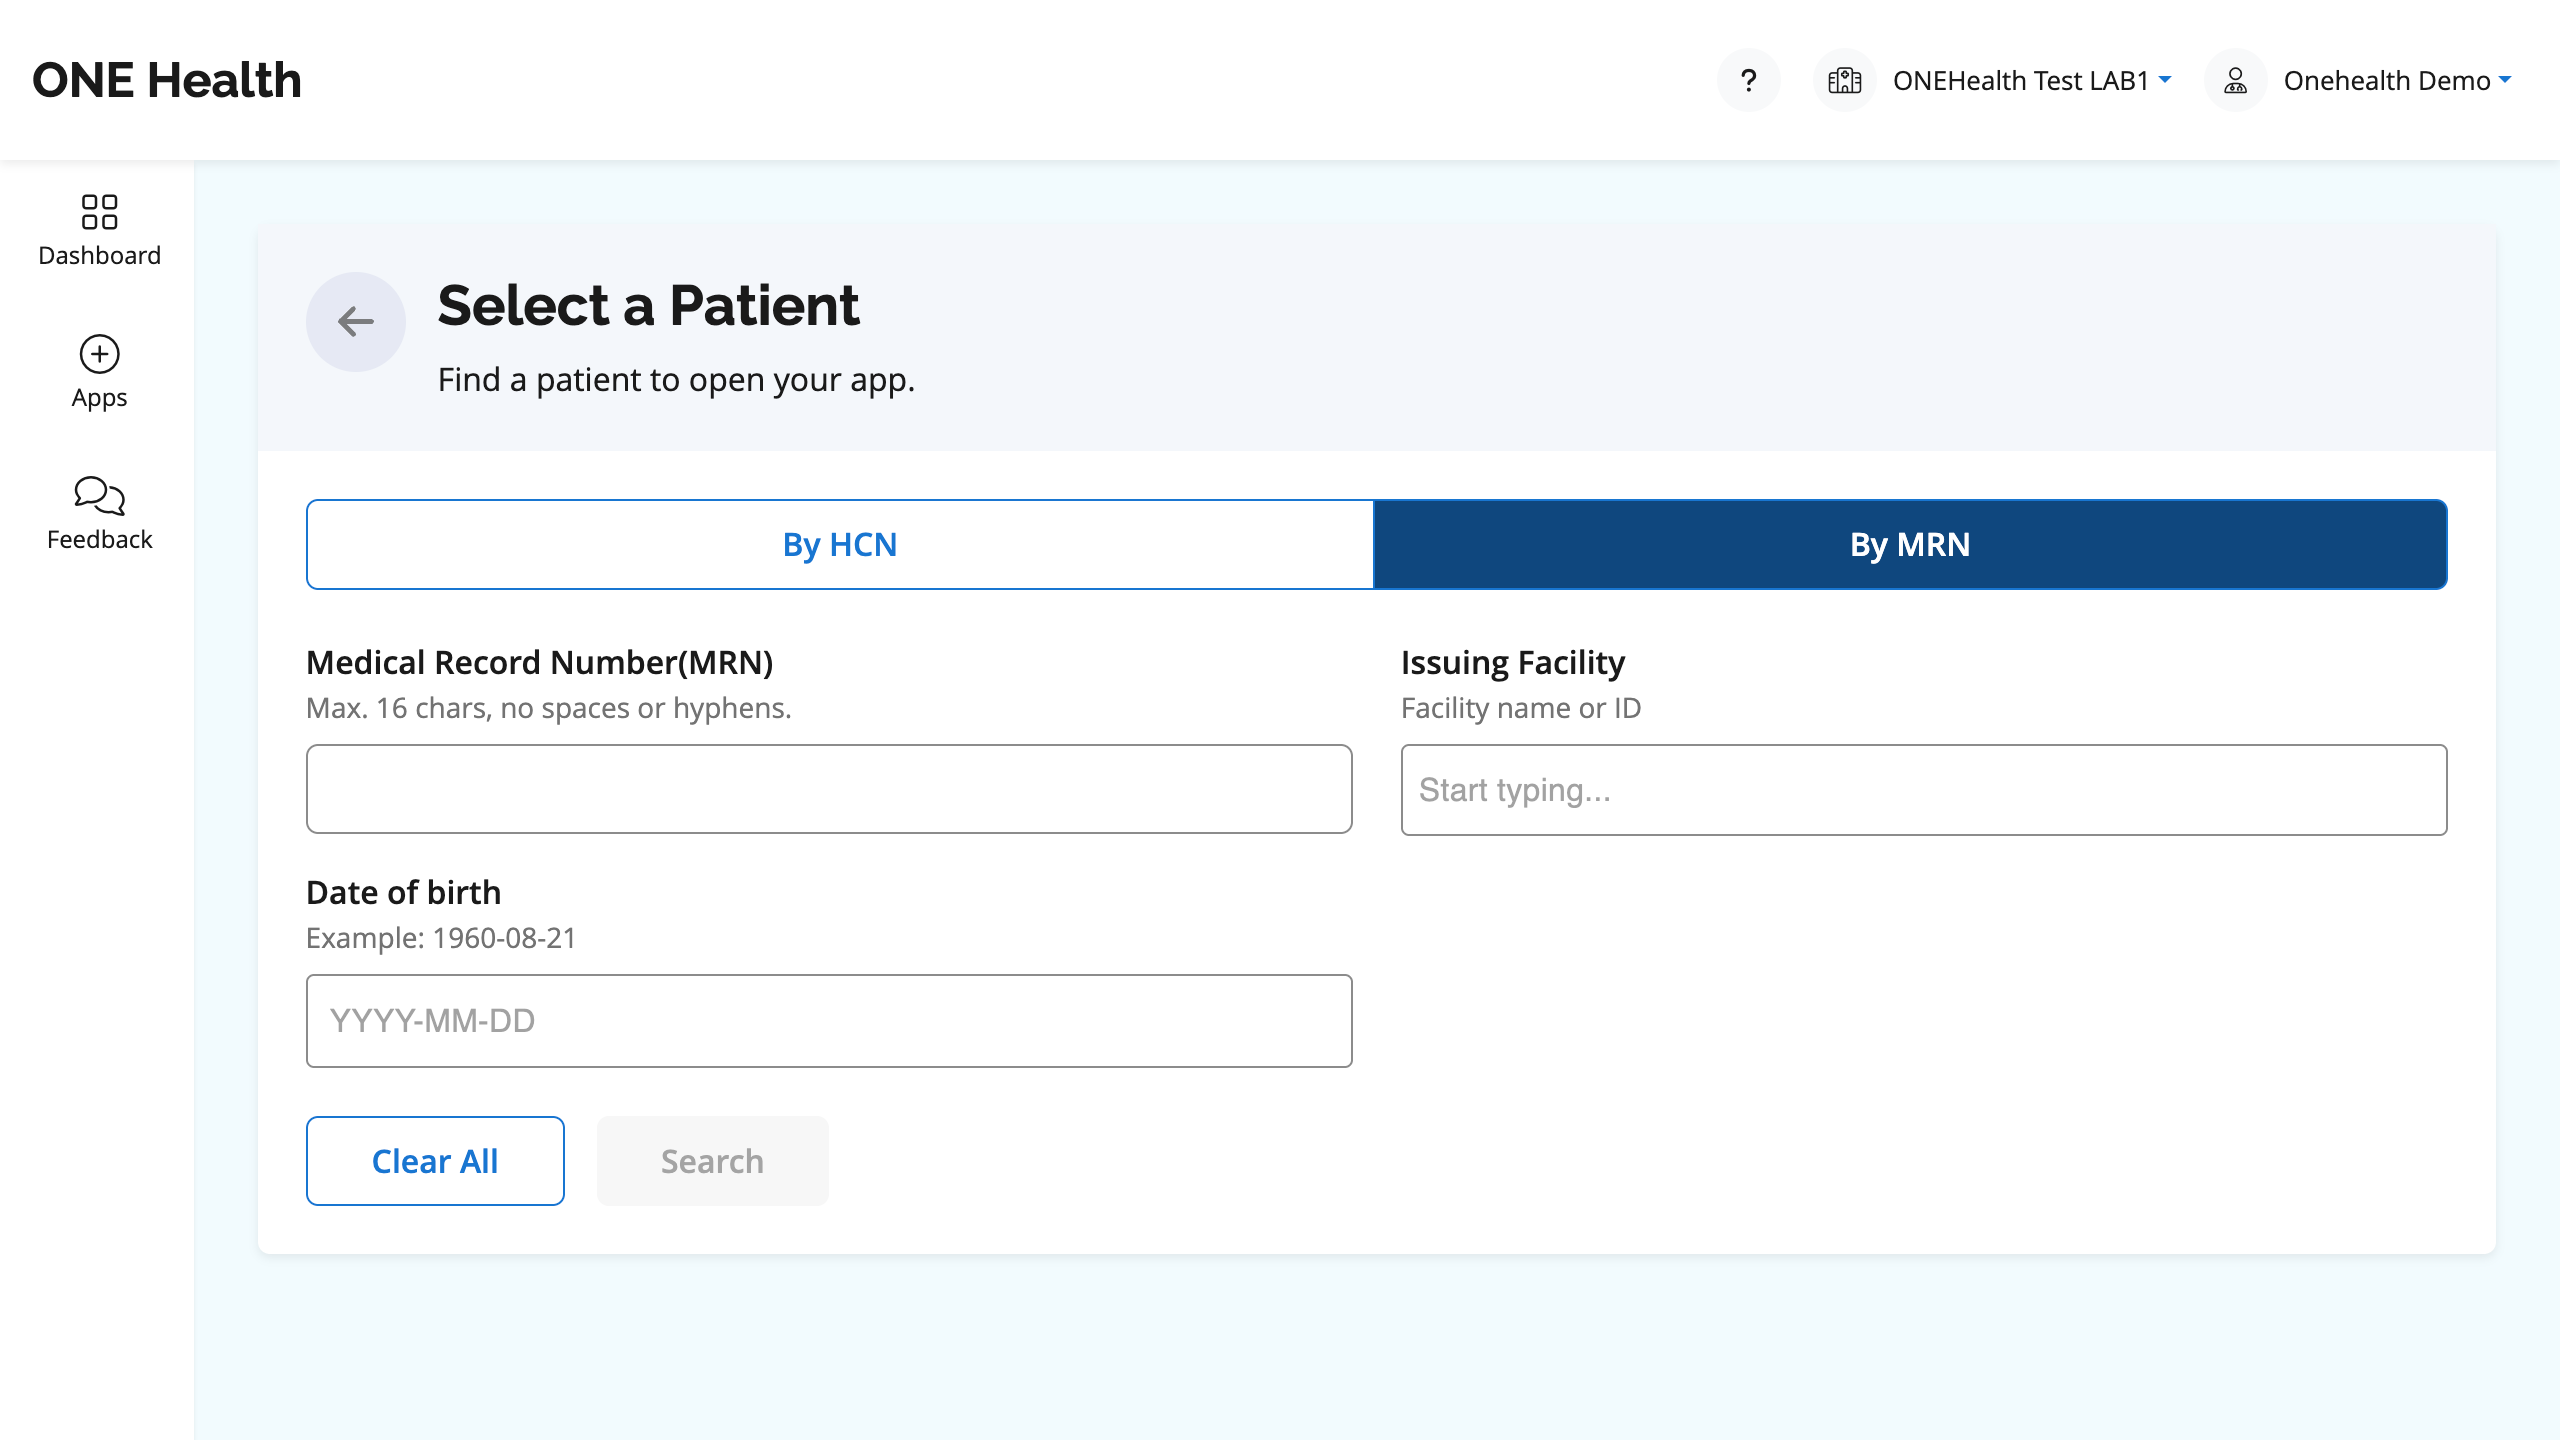
To search for a patient by Hospital Medical Record Number (MRN),select By MRN, enter the patient’s hospital medical record number and select Search.
To search for a patient by name, select By Name and enter the patient’s first and last name. Then, enter either the patient’s date of birth or their address and postal code, and select Search.
For Lab Validation users
Lab validation users can search for patients in the Ontario Laboratories Information System (OLIS), in one of two ways.
To search by Ontario Health Card Number (HCN), select By HCN, enter the patient’s health card number and date of birth, and select Search.
To search by OLIS Medical Record Number (MRN), select By MRN. Enter the medical record number, issuing facility name or ID (start typing name or ID in the search field) and the patient’s date of birth. Then select Search.
For Meds Validation users
Meds validation users can search for patients in the Digital Health Drug Repository (DHDR), in one of two ways.
To search by Ontario Health Card Number (HCN), select By HCN, enter the patient’s health card number, and date of birth. Then select Search.
To search by DHDR Medical Record Number (MRN), select By MRN. Enter the medical record number, issuing facility name or ID (start typing name or ID in the search field) and the patient’s date of birth. Then select Search.
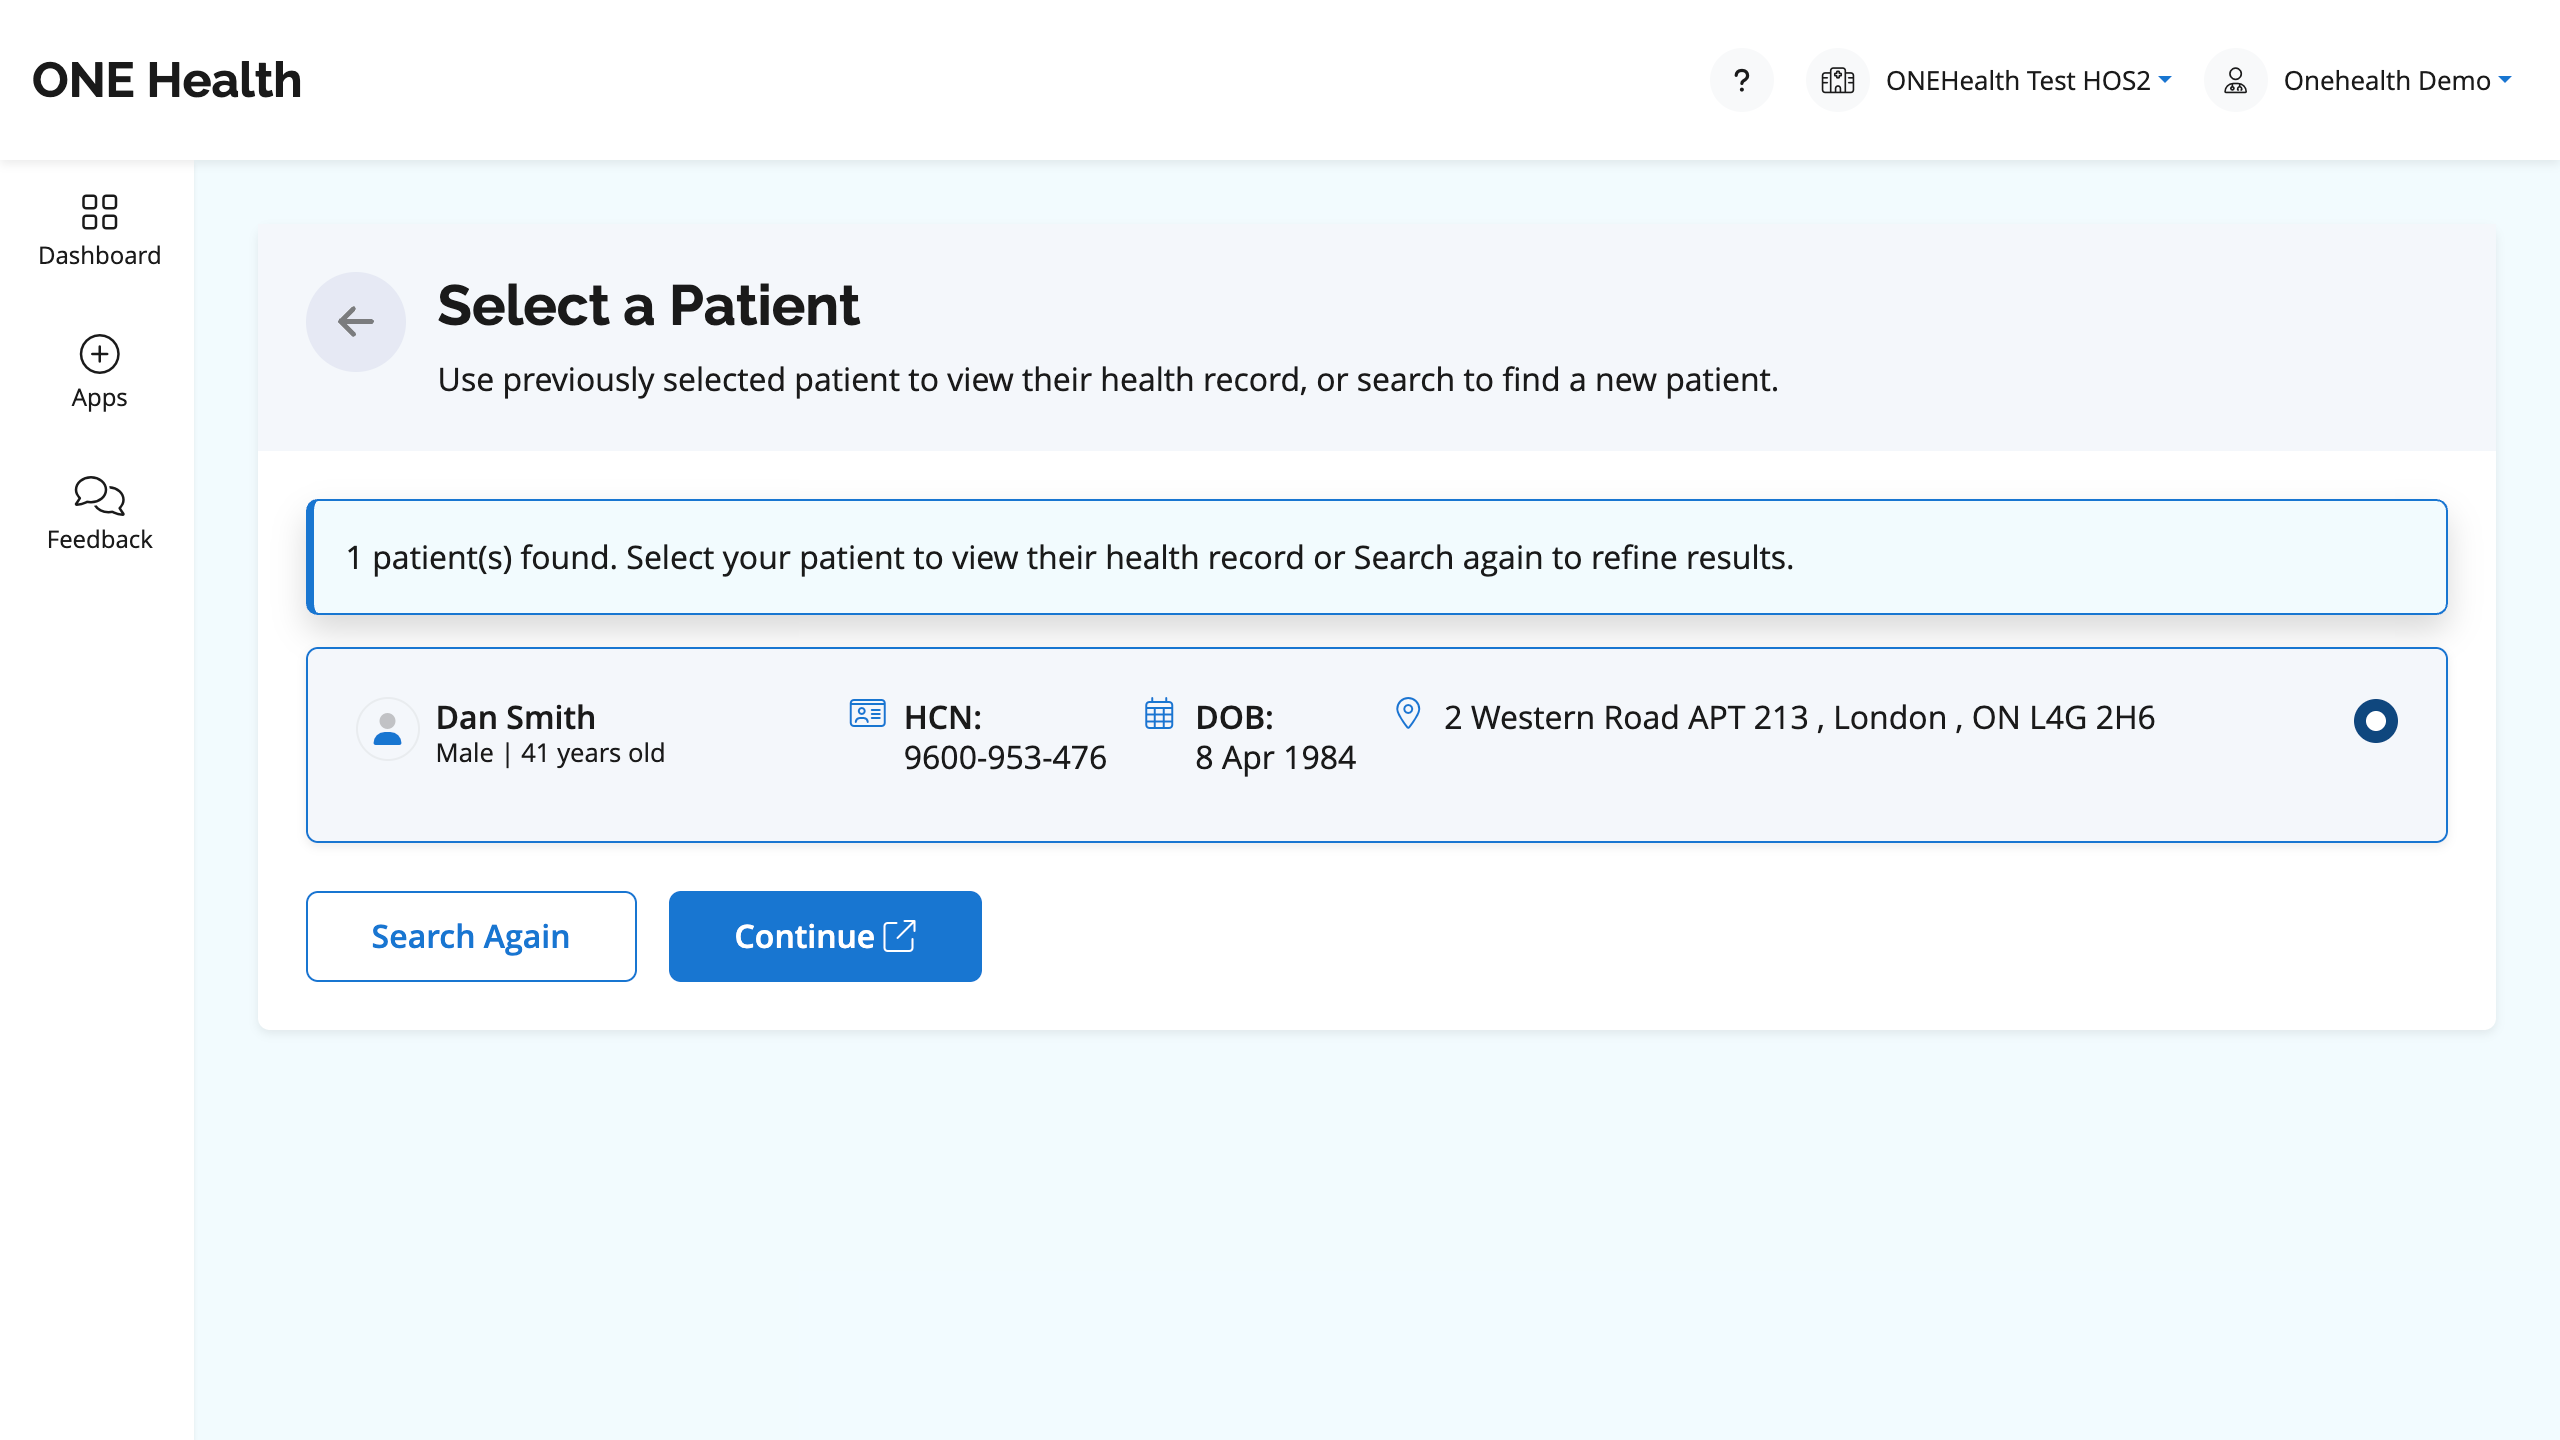
Patient Search Results
Patient Search results will be displayed based on patient query. Select the desired patient and select Continue.
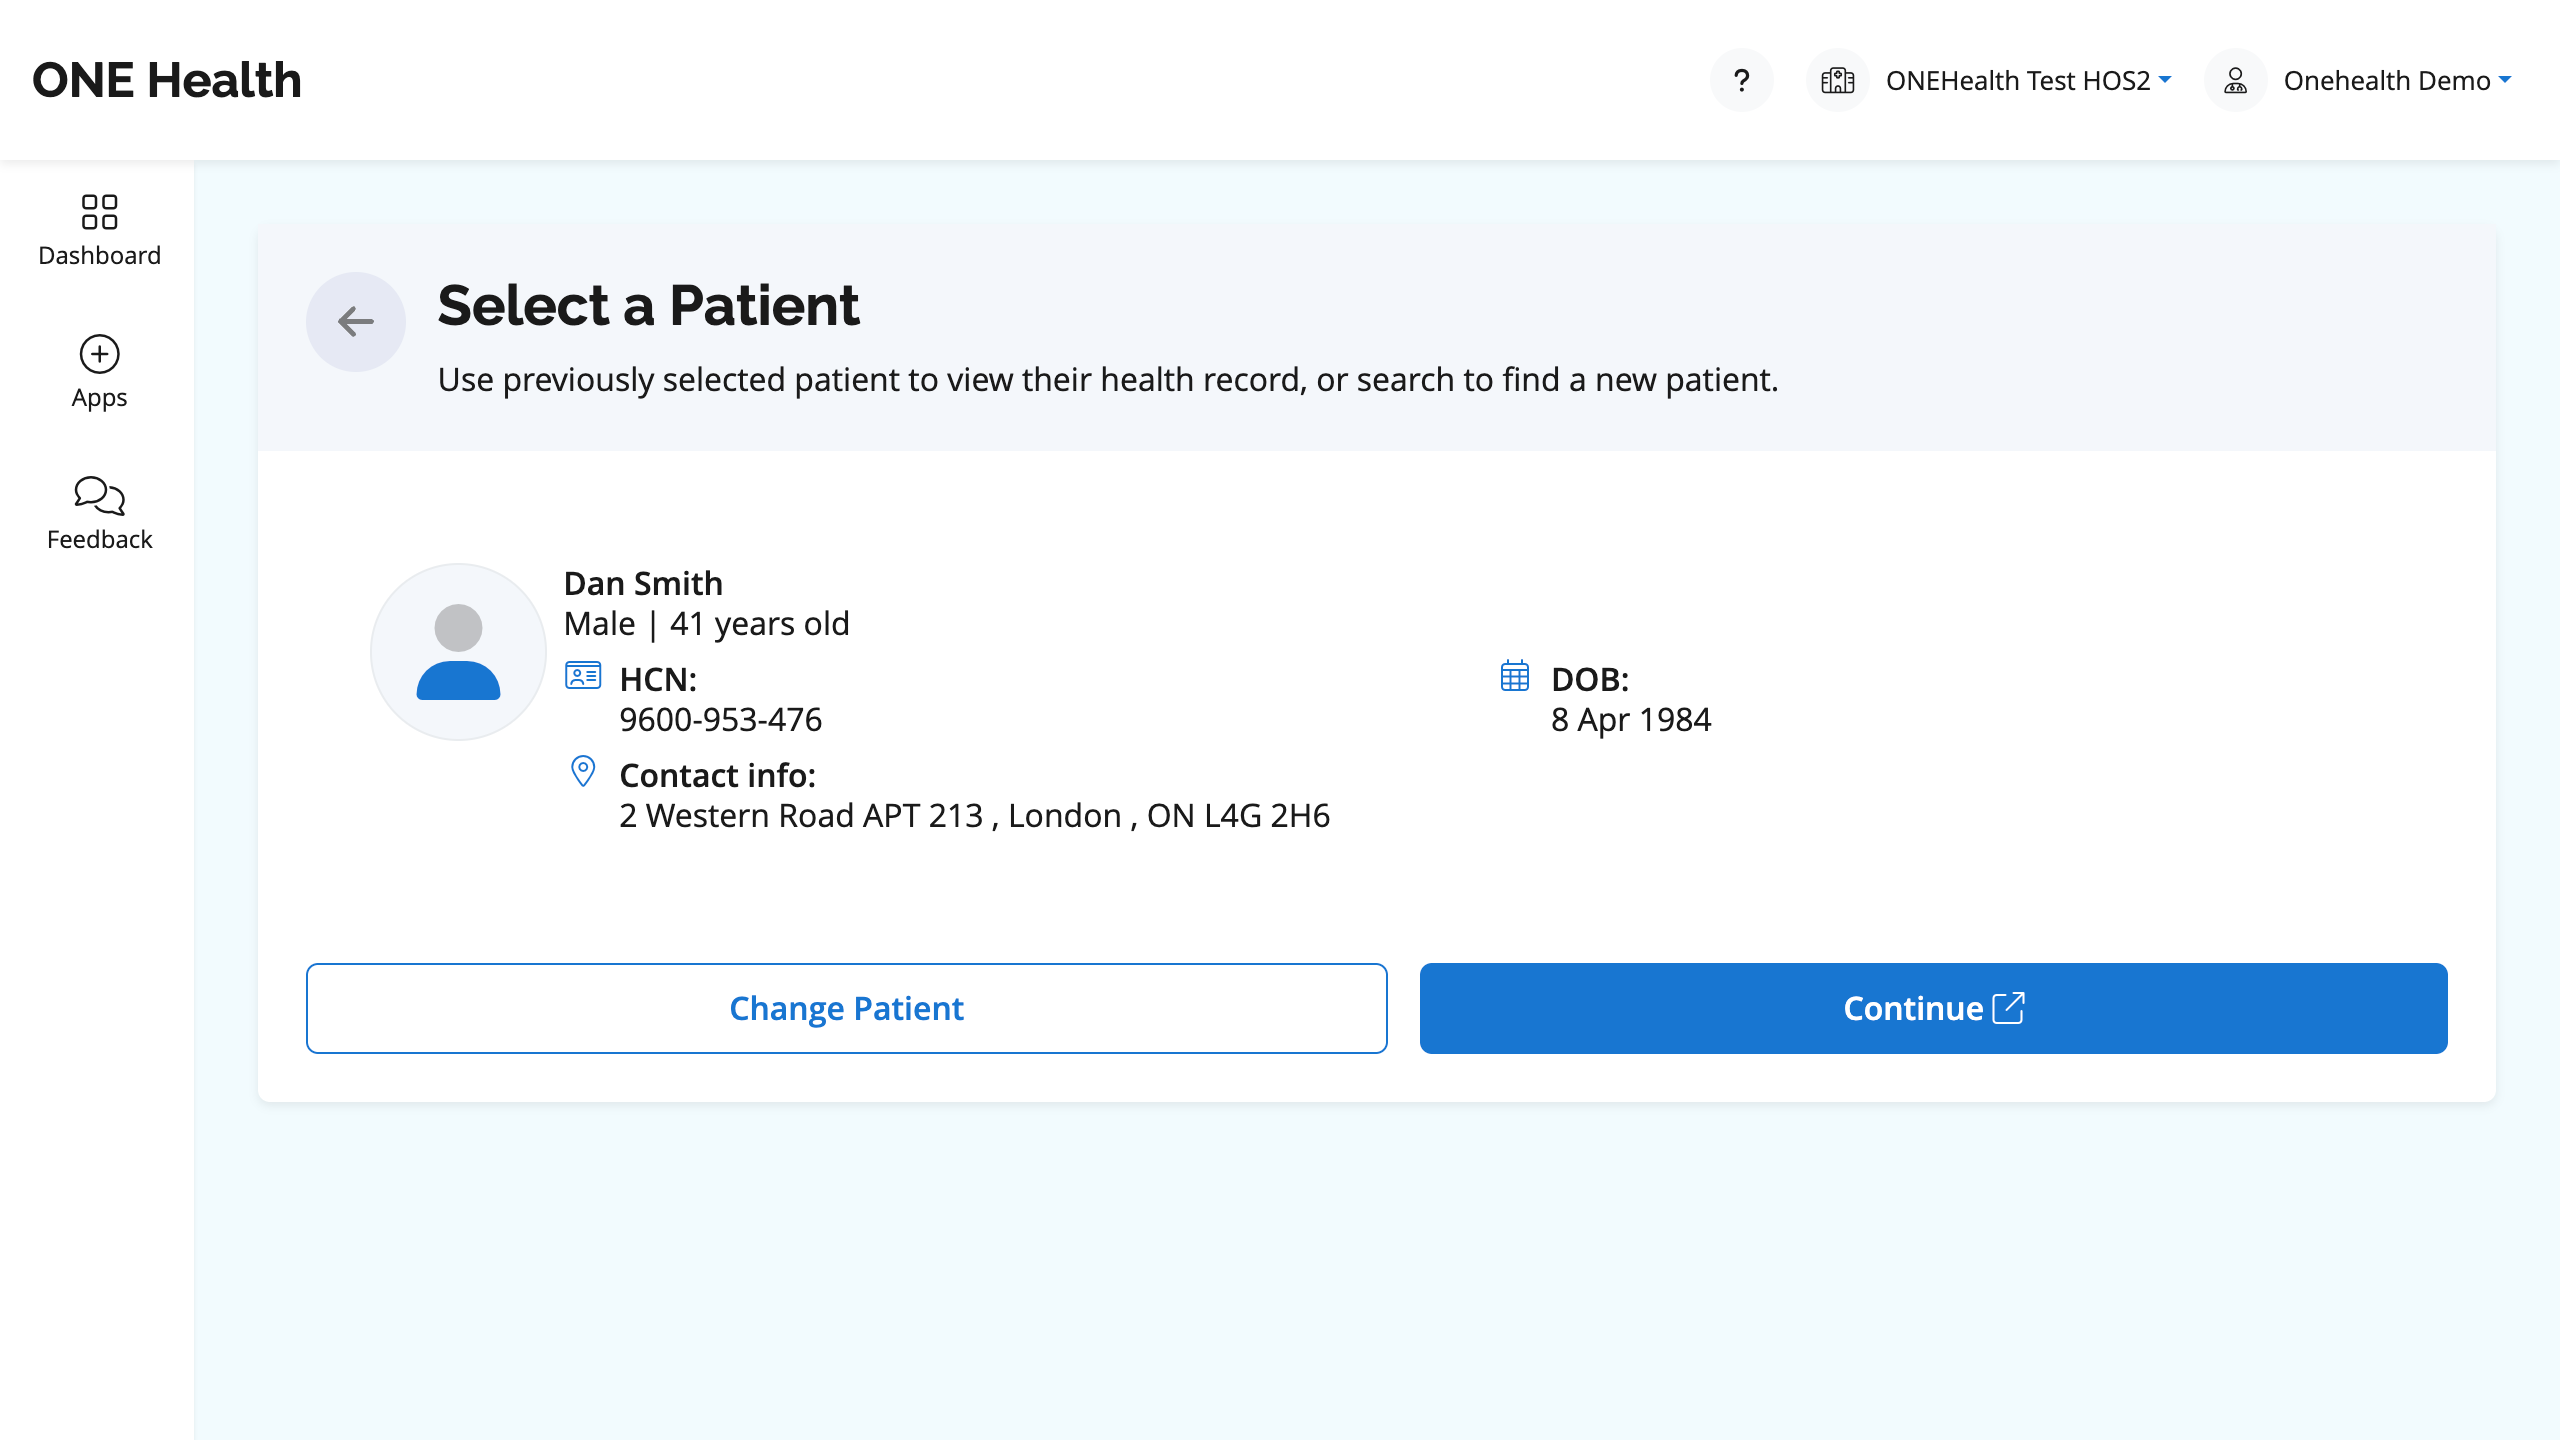
Patient Confirmation
Previously if one patient was selected, users will be presented with a patient confirmation screen. You can Continue with the same patient selected, or search for a new patient by selecting Change Patient.
Managing Your Preferences and Settings
You can customize your ONE Health experience by updating your preferences and settings.
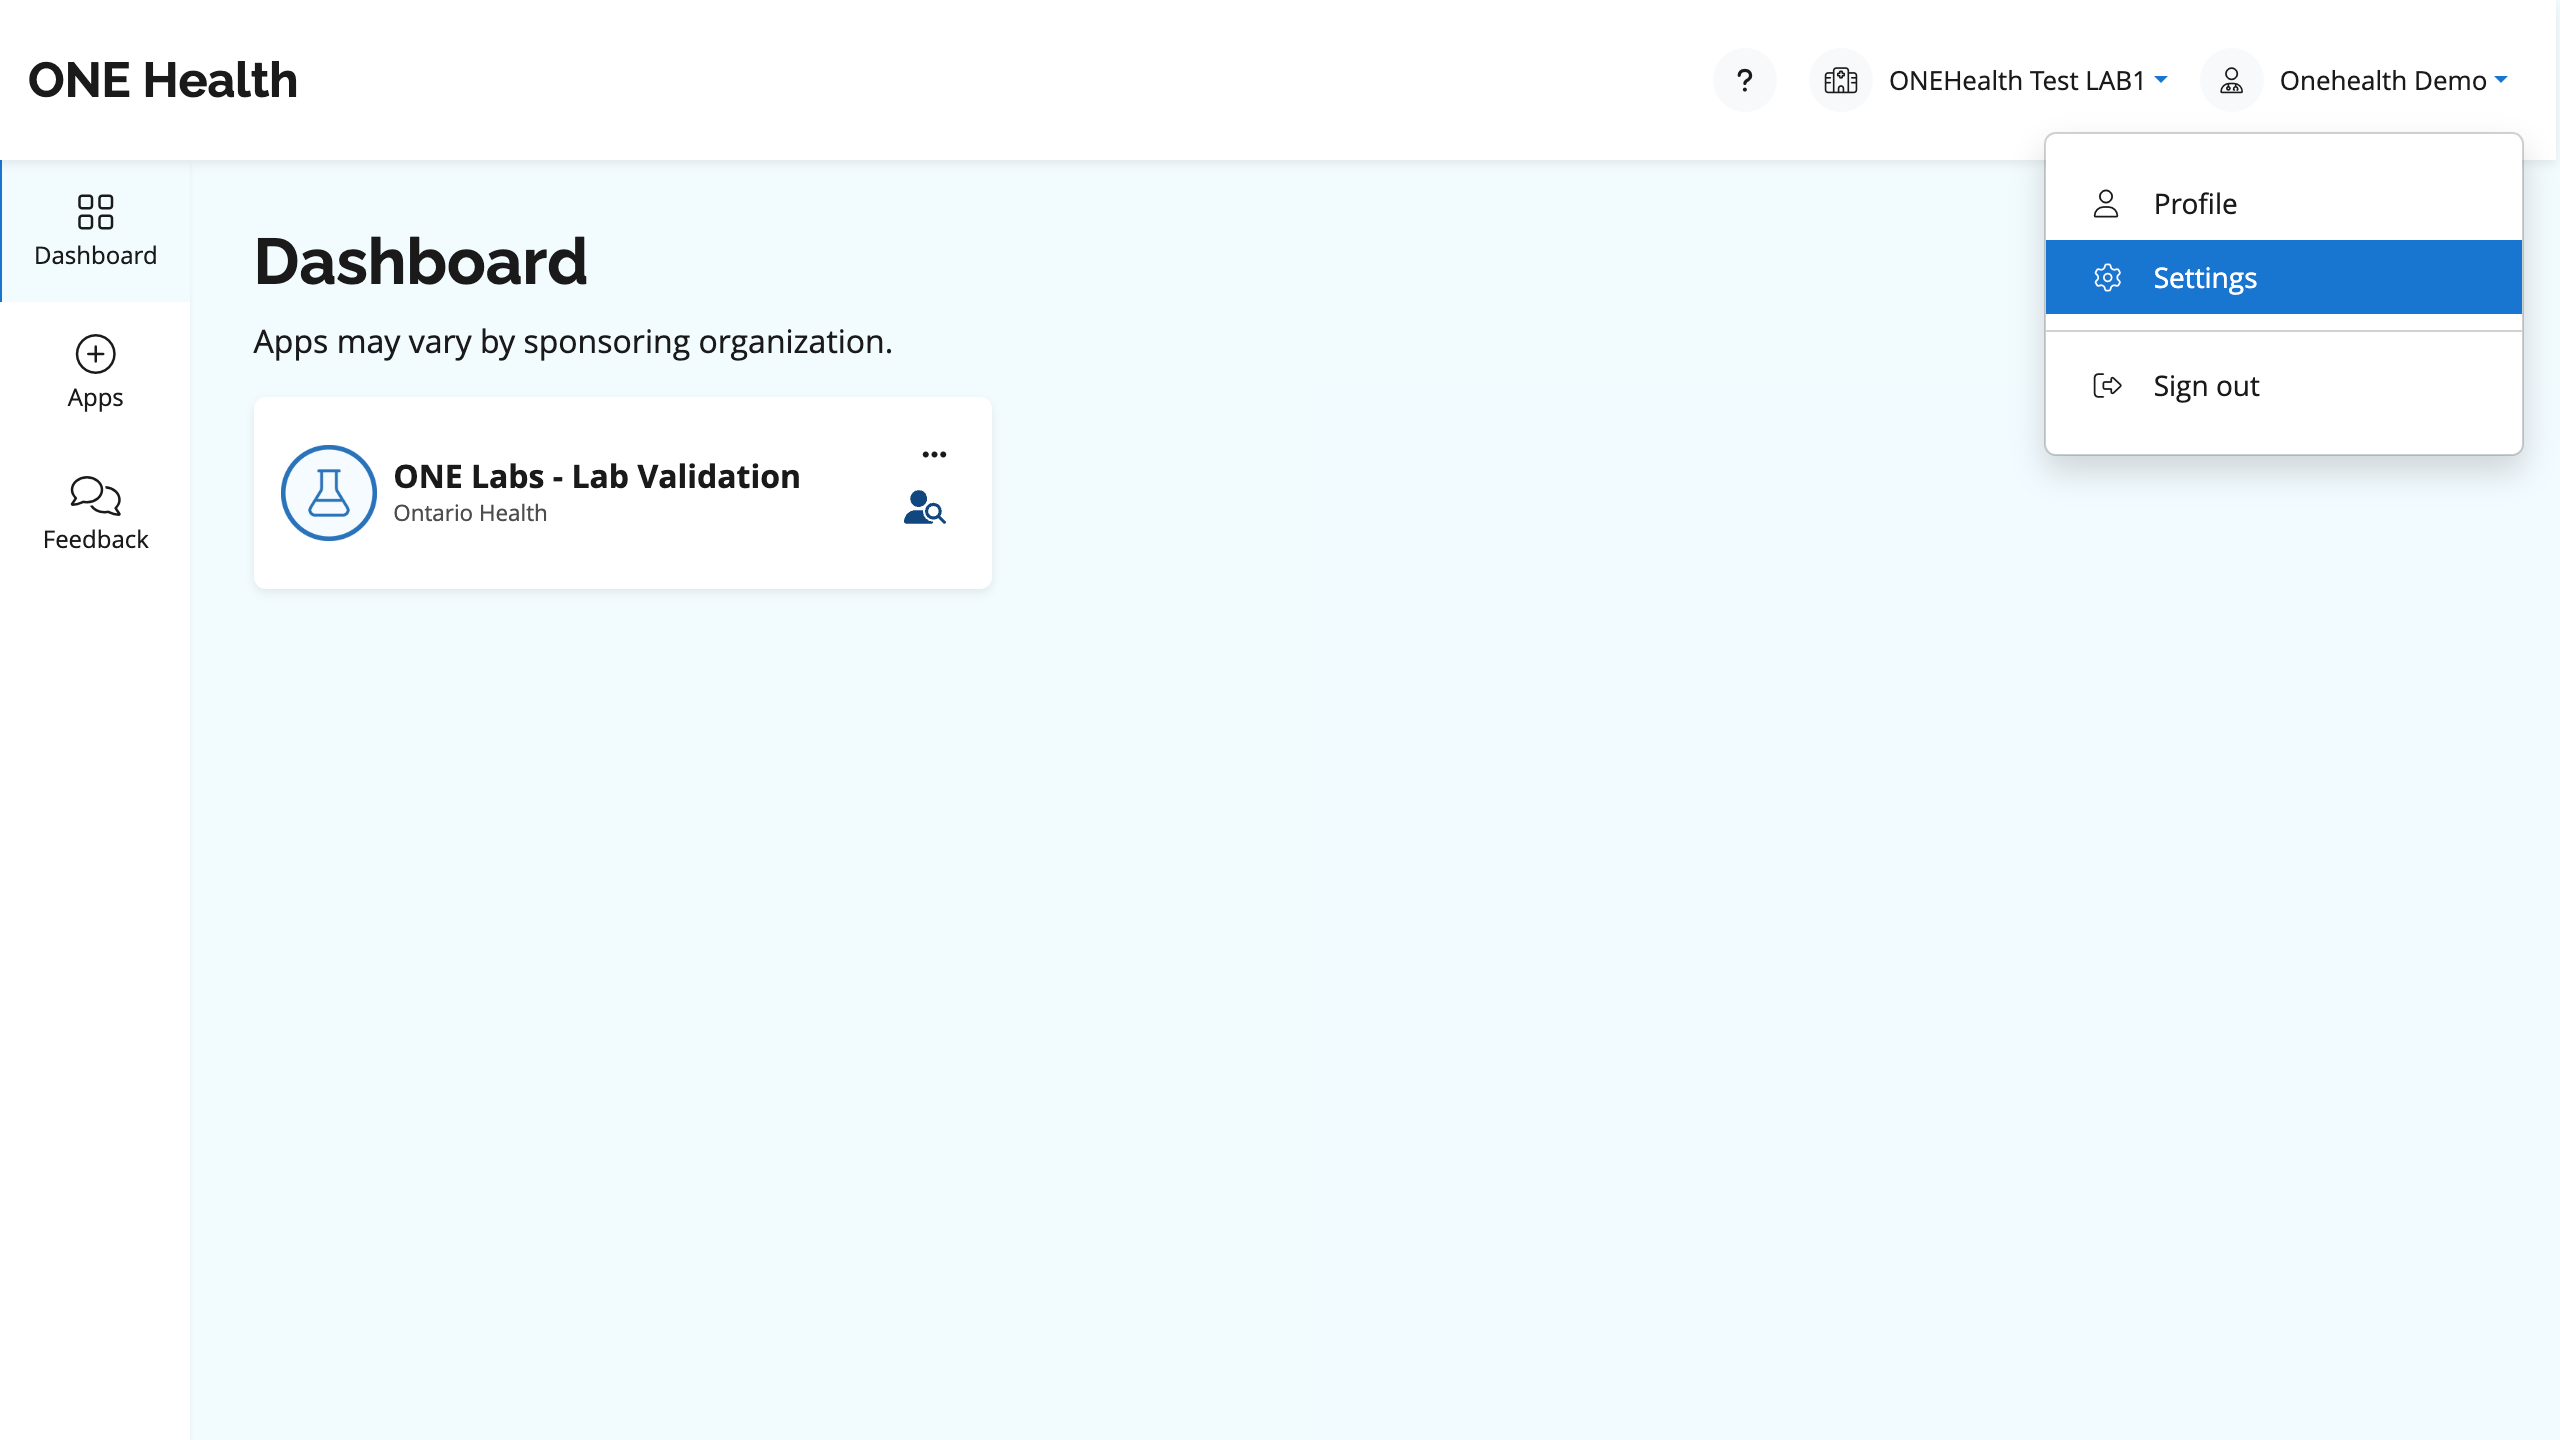
Accessing the Settings Page
Select the user icon in the top-right corner of the application header.
Select Settings from the dropdown menu.
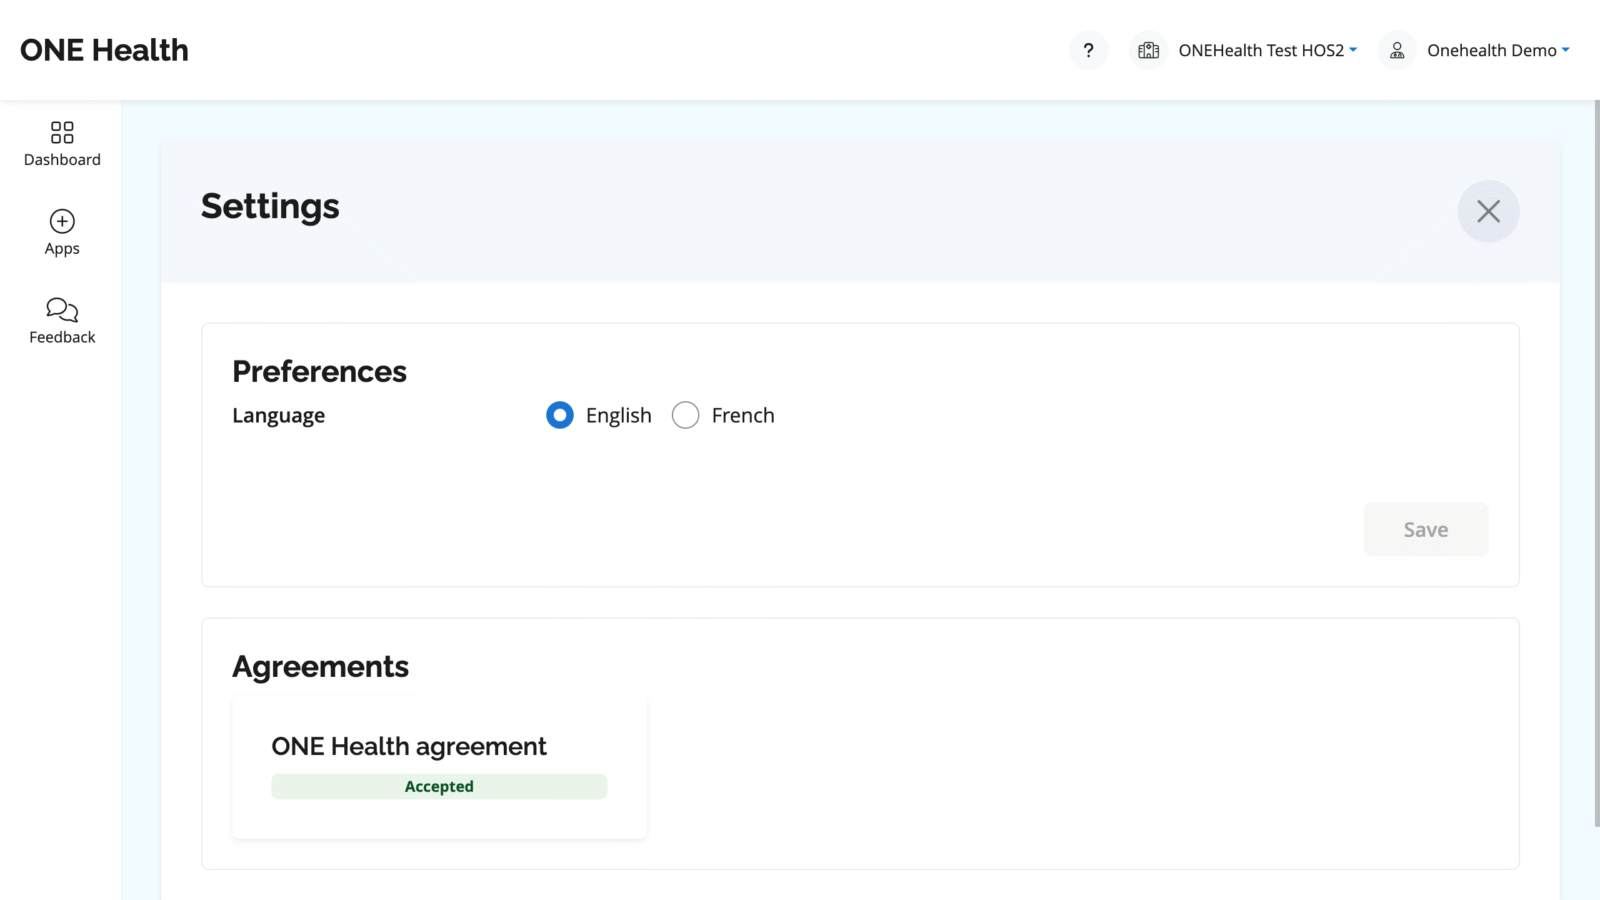
What Can You Manage?
Preferred Language: Choose your preferred language for the platform.
Agreements Overview: View the status of your current agreements at a glance.
Keep your preferences updated to optimize your use of ONE Health.
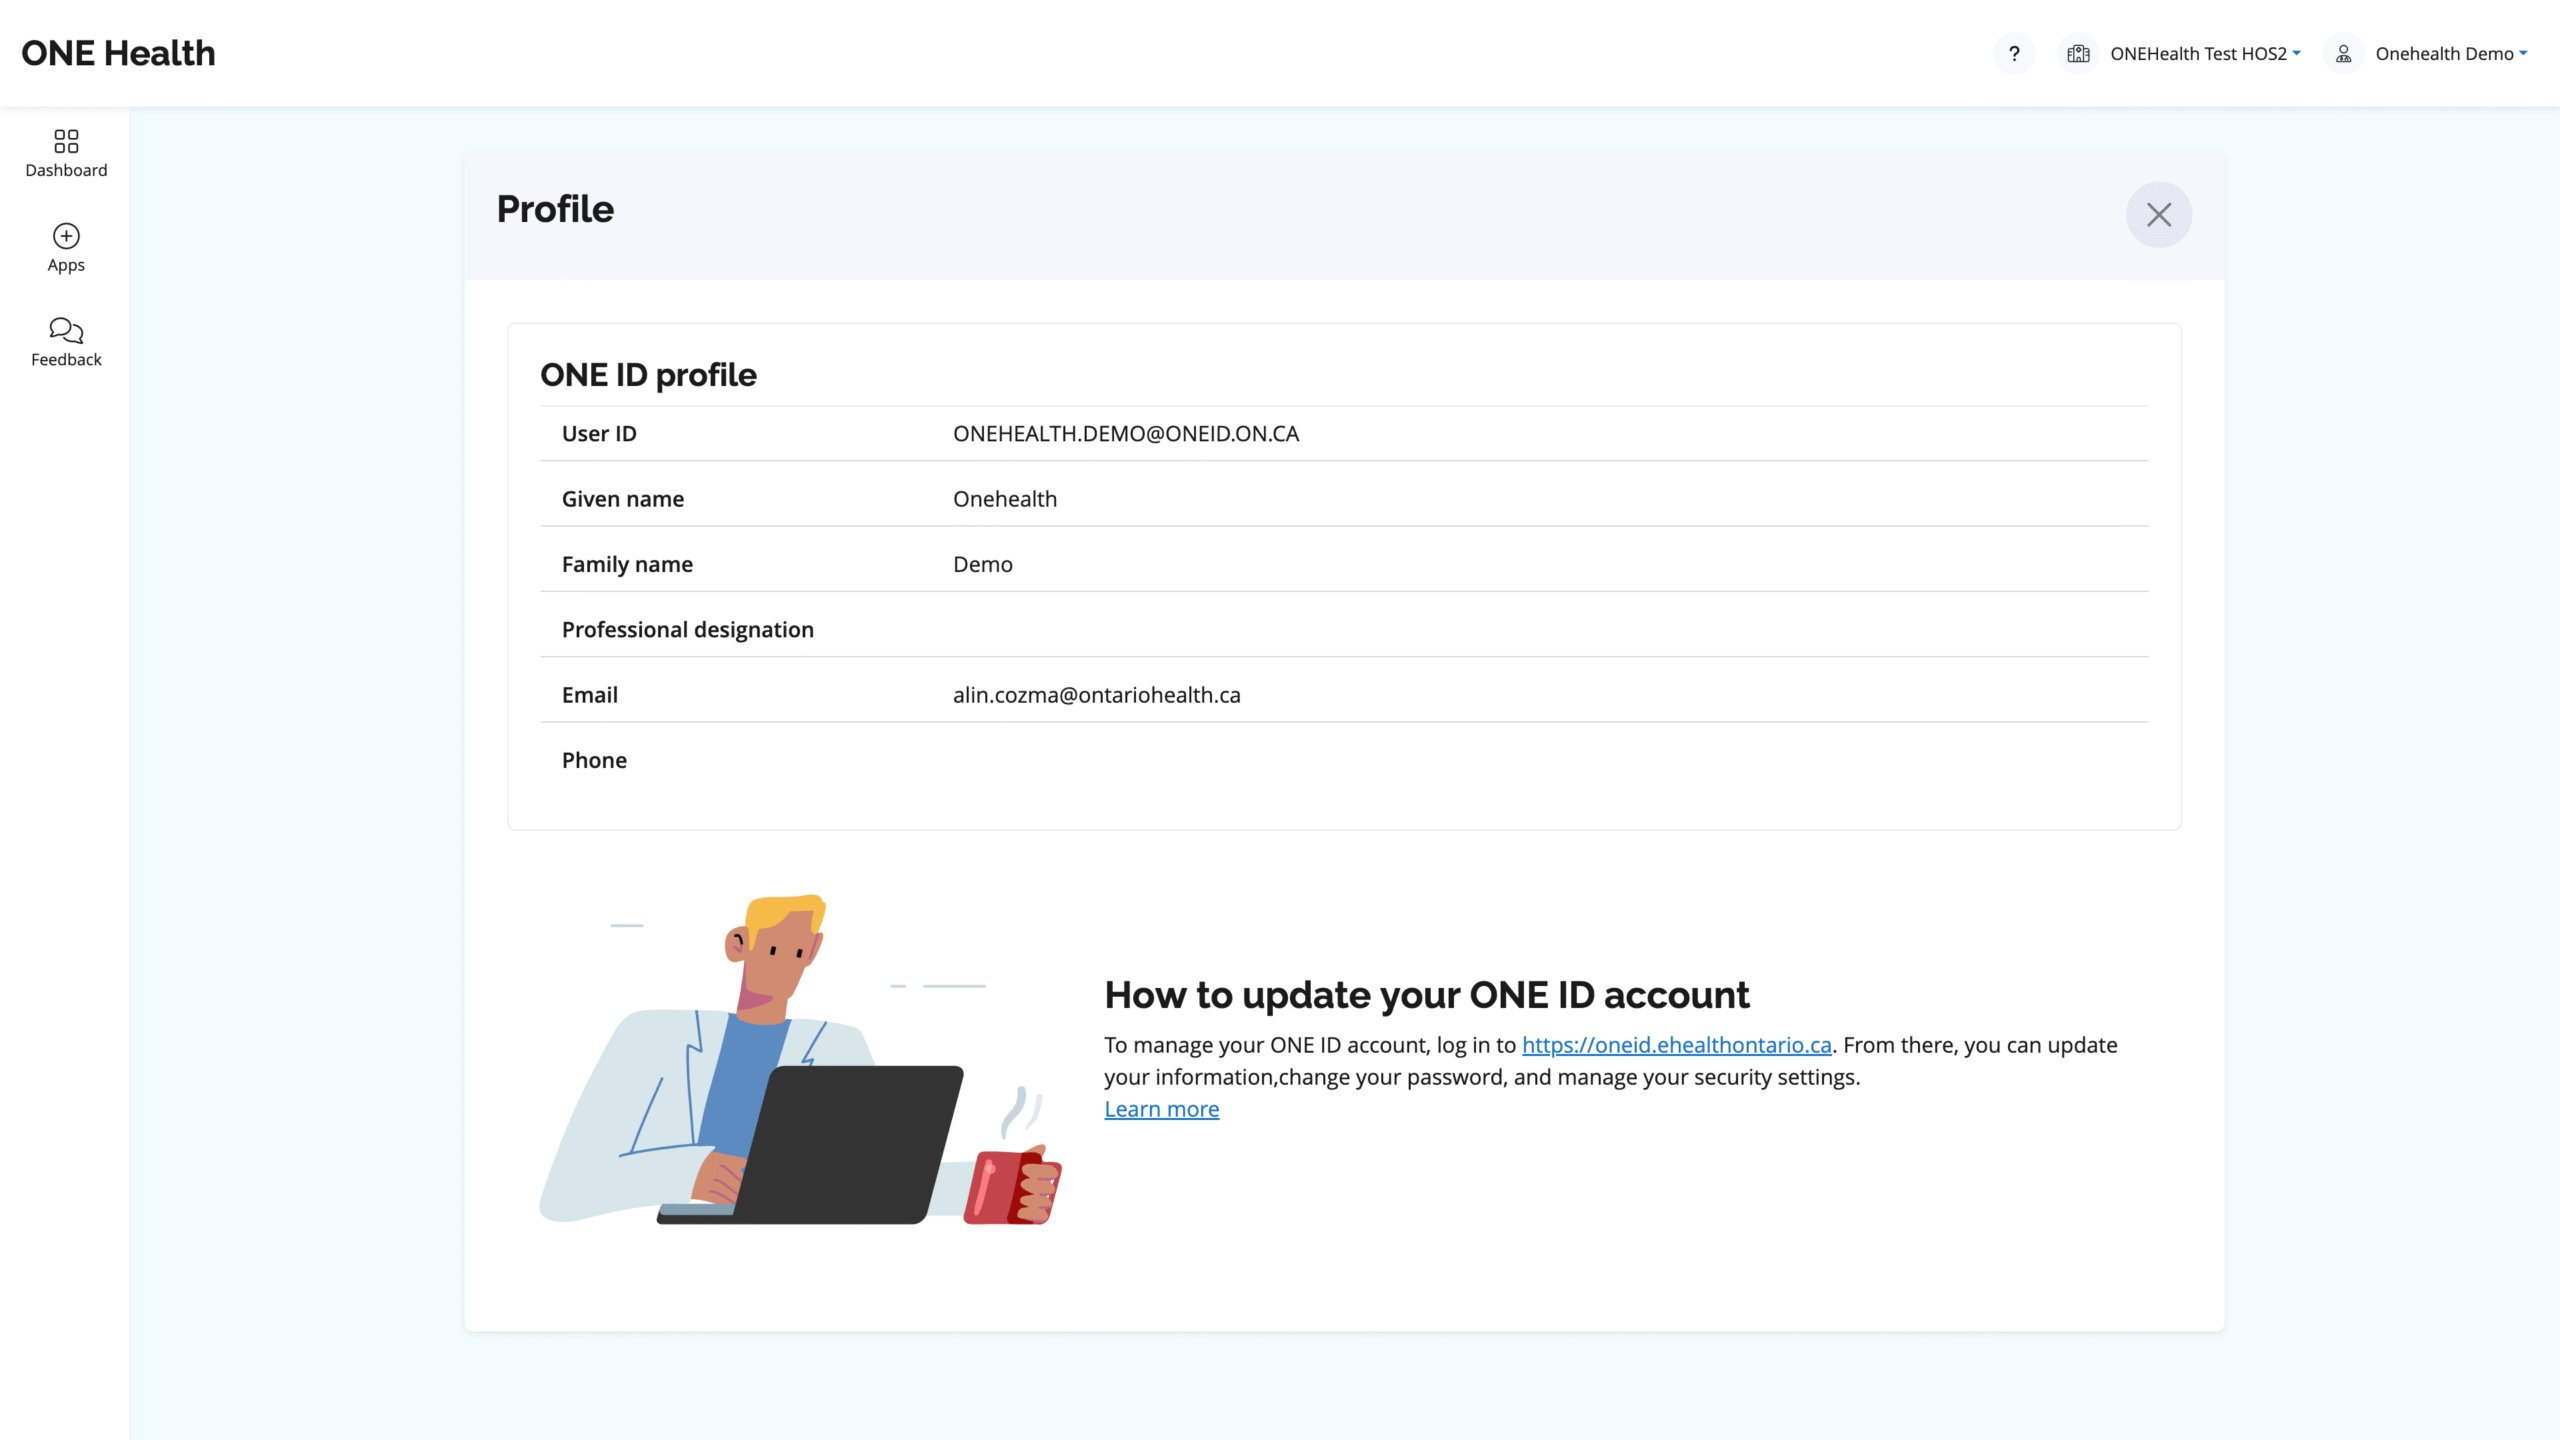
Managing Your User Profile
Your user profile in ONE Health provides key information linked to your ONE ID account.
Accessing Your User Profile
Click the user icon located in the top-right corner of the application header.
Your profile will display the following details from your ONE ID account, if available:
User ID
GivenName
Family Name
Professional Designation
Email
Phone
Updating Your ONE ID Account Information
To update or manage your information, follow these steps: